Thursday, 28 June 2012

The Baker's Apprentice: Potato Rosemary Bread

Oh man, I thought that with summer I'd have more time to post things here and more chances to practice taking pictures. So much for that! I can't entirely blame MCAT studying, because though it does take up a hell of a lot of time, I think it just comes down to summer laziness. Which is fine, right? I mean, it is summer (finally. The heat has set in. In true London style, it's been sunny, hot and humid for the last week, with random days after storms when its cool. Gotta love it!).

I meant to bring my camera with me last weekend down to Victoria Park- it was the first food festival of the summer. So many good eats and I wanted to share it, but, unfortunately, I'm forgetful. I didn't remember until I was at the fest. But fear not! Since there is practically a food fest every other weekend during the summer, I'm sure I'll have another chance to grab some pictures.

It was a pretty awesome festival though, I must say. With food ranging from American pizza, to Jamaican ox-tail and everything in between. There were lots of Korean and Vietnamese vendors, as well as a few Caribbean ones as well. I had to go for curry goat with rice a peas. It was just pure Jamaican deliciousness. Made me wish I was in Jamaica still (where it probably would have been cooler).

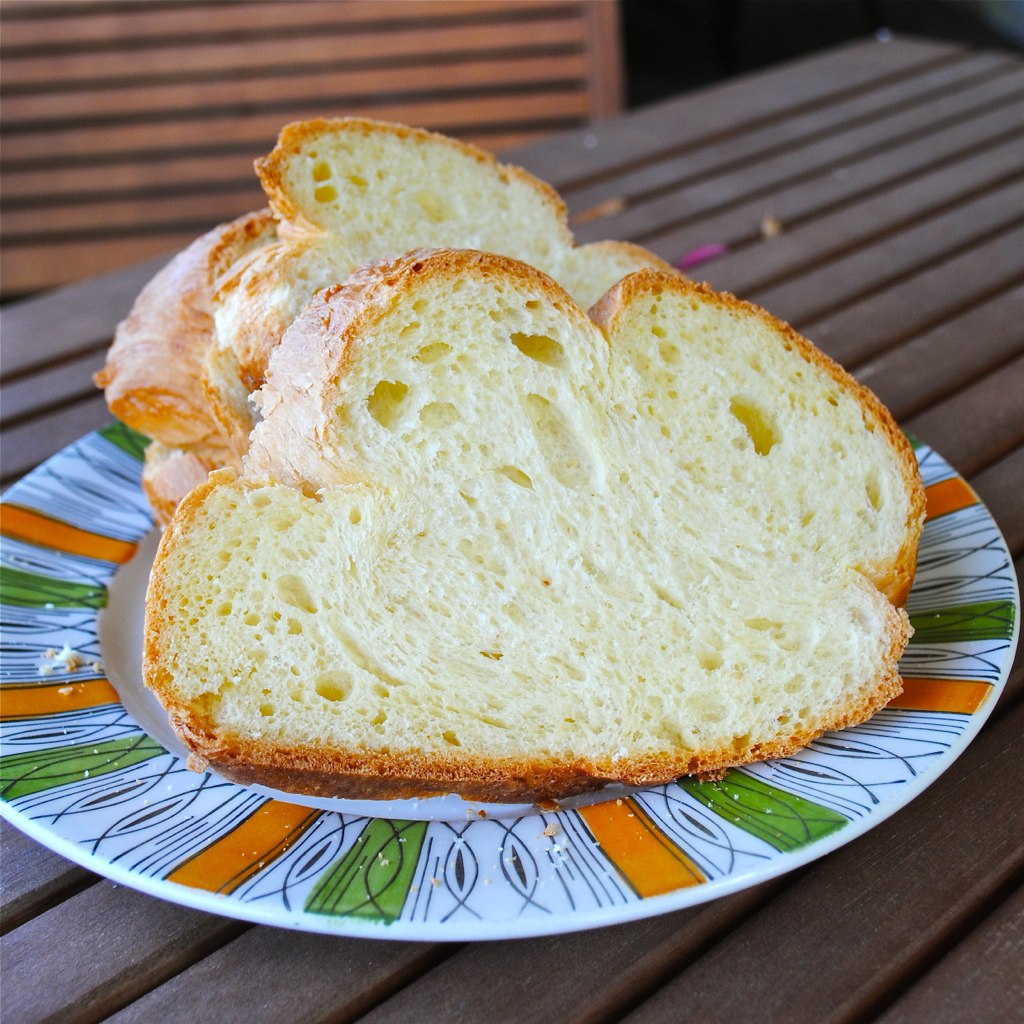
A few of my old elementary school friends are coming up for a visit this weekend and I am ready for a huge foofaraw! We're having a slumber party Sunday. Which is basically just a cute way of saying we're going to get wasted. Still, there will be lots of eating involved as well. The point is, Monday I wanted to do a breakfast bake, since I could just prepare it the day before and leave it overnight. Which brought me to baking bread, since this is my last week not cramming MCAT into my head. And of course, when going for bread, I turned to my Baker's Apprentice cookbook, since I am determined to try every recipe he has, and chose his potato rosemary bread simply because I had Ontario potatoes lying around.


I even made my own mashed potatoes. Seriously guys, the better your mashed potatoes taste, the better this bread will taste. Mine was full of garlic, green onions, butter and parmesan cheese and the bread tasted awesome. I had to make sure not to eat half the loaf off (like I usually do).

The recipe makes enough for two regular sized loaves, so you could definitely do what I did and use half for a casserole, or even freeze it for later! It does take some preparation, what with having to make the biga (a starter) the night before, as well as letting it rise for a total of 4 hours. But dude, it is very much worth it. Especially if you make it on a day when you're just lazing around the house anyway (though I did do some cleaning while I let it rise, so it wasn't so much as lazing as procrastinating studying).

I used the recipe straight from the cookbook, so if you have a copy, this is me highly suggesting you try the potato rosemary bread next time you open it up. If you don't have The Baker's Apprentice, you can go buy it (here, or here, for Canadians)- which I highly suggest you do. So far, it's been one of the best purchases I've made this summer!- or you can find the recipe online. I love Brown Eyed Baker, so I'd suggest checking out her version here.

Either way, I hope you guys go for it and enjoy it as much as I did! Make it for your family, friends, loved ones or just for your awesome, gluttonous self. NOTHING SAYS I LOVE YOU LIKE A LOAF OF FRESHLY BAKED BREAD.

Thursday, 14 June 2012

Daring Cooks: Salmon Cannelloni

Manu from Manu’s Menu was our Daring Cooks lovely June hostess and has challenged us to make traditional Italian cannelloni from scratch! We were taught how to make the pasta, filling, and sauces shared with us from her own and her family’s treasured recipes!


Oh hells yeah, we're doing cannelloni this month! I love pasta and cannelloni is an awesomely satisfying dish that looks impressive but really isn't all that difficult to make. I've been bad these past couple months and haven't had time to do the Daring Cooks challenge, so I made sure to get my butt in gear this month. And, come on, it's cannelloni. No complaints here.

I wanted to do something healthy and low in fat and calories, since it is summer and everyone is trying to lose weight and get into that beach-ready state. I should probably join them in their endeavors, and what better way than making a delicious pasta casserole that's actually good for you?


So this is my cannelloni contribution. I used low fat ricotta in the filling and mixed it with canned salmon and local spinach and peppers (I even resisted topping it with 10000 cups of cheese). Yeah, it was as delicious as it sounds. Though it being low calorie and all, you have to restrain yourself from arguing that that means you can eat half of it.

Salmon Cannelloni
Ingredients
• 2 cans of salmon, drained
• 1/2 cup of low fat ricotta
• 1 red pepper, chopped
• 1 cup spinach, chopped
• 2 cloves garlic, minced
• 1 tsp olive oil
• 18 tubes of cannelloni (depending on the size of cannelloni. I used small tubes)
• 2 cups of your favourite tomato sauce
• 6 slices provolone cheese (about 1/2 cup shredded)

Directions
Preheat oven to 350F.

Heat olive oil in a small skillet over medium heat. Add garlic and sauté for 1 minute. Add spinach and cook until wilted. Season to taste with salt and pepper.

Flake salmon into a medium sized bowl. Add ricotta, red pepper and spinach. Season to taste with salt and pepper. If you find it's too dry, add more ricotta (or, if you want, you can use 1 egg).

Spread 1/2 cup of the tomato sauce over the bottom of a 9x13" casserole dish. Using a small spoon (or a piping bag, if you've got the skills), fill the cannelloni tubes, placing them in rows on top of the tomato sauce. Once all of the tubes are filled, top with the remaining tomato sauce. Spread cheese slices on top.

Bake, at 350F, for 20 minutes. Then, turn on your broiler to high and broil for 2-3 minutes, or until the cheese is golden and bubbly. Enjoy!

Thursday, 31 May 2012

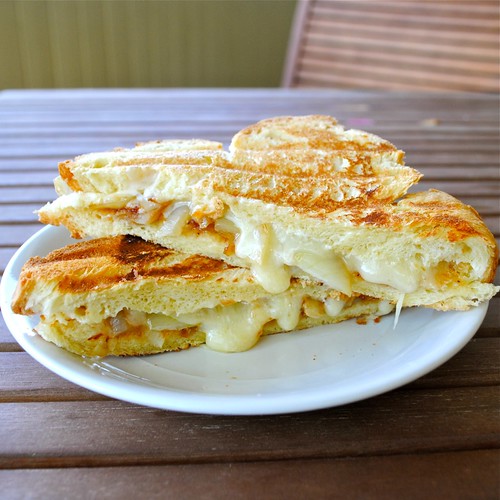
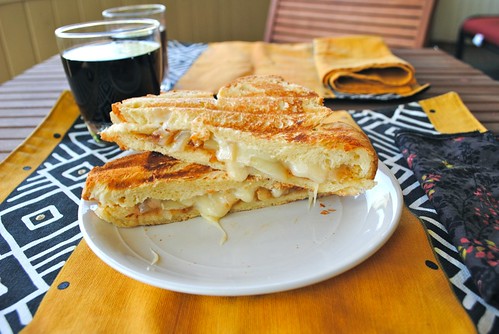
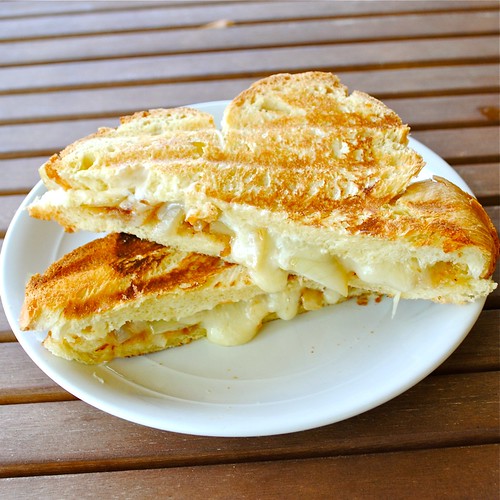
Papaya Chutney Grilled Cheese

I think I'm a little late jumping onto the whole grilled cheese bandwagon- especially since its national month has already come and gone. Still, better late than never, right? Especially when you have homemade bread to submerge in cheese.


Is it just me or has grilled cheese become even more amazing over the past year? The different combinations of ingredients and flavours I've seen the food community chug out make my mouth water. I want to try all of them! I mean, just think back to when you were a kid and grilled cheese meant just two slices of white bread with kraft cheese. Not like there's anything wrong with that (best hangover cure, if you ask me). But now, I'm seeing sloppy joe grilled cheese, guacamole grilled cheese, even chocolate parmesan grilled cheese (now that I have to try).

I guess that just goes to show how even the simplest, most nostalgic dishes can be made into an explosion of culinary creativity. And that's just poetic. So here's my contribution: a mouthwatering, savoury combination of Caribbean chutney, sharp cheddar and caramelized onions, all on homemade bread. I came upon papaya chutney on my last day in Jamaica. My mom wanted to get rid of her last few hundred Jamaican dollars and told me to pick something to bring home. I spotted the papaya chutney and thought: 'now that sounds good'. I was wondering what it would taste like- whether it would be sweet or tangy- when I first did try it I was surprised. It has the almost same sort of taste as caramelized onions, but it's more savoury than sweet. The sweetness kicks in just a bit to give it a unique, addictive taste. This is the first time I've used it in a recipe, but, man, did it deliver! If you can find papaya chutney, buy it! It's the kind of ingredient that makes you want to experiment.


Papaya Chutney Grilled Cheese
Serves 2
Ingredients
• 4 slices of your favourite bread
• 1 medium onion, halved and sliced
• 1 tbsp olive oil
• 1 tsp balsamic vinegar
• 2 tbsp papaya chutney (can be found at your local Caribbean store or Asian market. If you can't find it, I suggest using tomato chutney or any other savoury spread)
• 6 slices old cheddar
• 1 tbsp butter or margarine, softened
• 1 tbsp mayonnaise

Directions
Heat oil in a small frying pan over medium heat. Add onions and sauté until translucent, about 5-7 minutes. Turn the heat down to medium-low and let caramelize for 5-10 minutes, or until a deep golden. Add balsamic vinegar and cook for 1-2 minutes more. Remove from heat and set aside.

Mix together the butter and mayonnaise in a small bowl. Set aside.

Spread 1 tbsp of papaya chutney on 1 slice of bread. Top with half of the caramelized onions and 3 slices of cheese. Close the sandwich with another slice of bread. Repeat with the second sandwich.

Heat a skillet at medium heat. Spread the butter/mayo mixture on the outside of each sandwich. Pan-fry on each side until the bread is golden brown and the cheese is gooey and amazing, about 2-3 minutes per side. Remove from heat and enjoy.

Monday, 28 May 2012

Daring Baker's Challah Bread

May’s Daring Bakers’ Challenge was pretty twisted – Ruth from The Crafts of Mommyhood challenged us to make challah! Using recipes from all over, and tips from “A Taste of Challah,” by Tamar Ansh, she encouraged us to bake beautifully braided breads.


Oh man, to say I was pumped we were doing bread this month may be an understatement. I absolutely love bread, as I may have mentioned before. That, and I just got my very own copy of The Baker's Apprentice. Many other food blogs have worked their way through the book and I was itching to get my hands on it. Once I did, I decided that I was going to follow in my peers' footsteps and complete all the recipes. Hilariously enough, my friend got the same cookbook from her boyfriend, so turns out we're doing it together. We've already done the English muffins, which were mouthwatering, and when I saw that this month's Daring Baker's challenge was challah, I knew I had to try out the recipe from the Baker's Apprentice. 


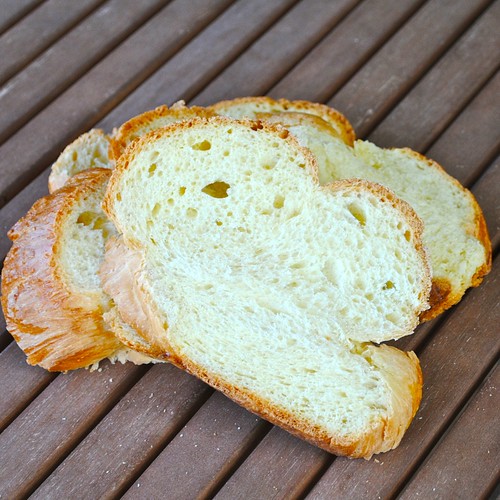
Coincidentally, I made the loaf on the Saturday of Victoria Day weekend. I started out fine... But as the dough rose and the day wore on, my roommate and I decided to mix some cool drinks and sit outside in the backyard. Admittedly, my memory of finishing the bread is a bit fuzzy. I don't even remember braiding it, but apparently I did (and it didn't look half bad!). Though, by the time I got to take a picture of the finished loaf.... we had eaten half of it already:


Either way, by some miracle the bread was finished with no casualties. And, damn, did it taste delicious. I love the softness of the inside of the loaf, contrast to the crunchy crust. Just. Heavenly. I'll refrain from writing an ode about bread and my minor obsession with it. Just get in there and try it for yourself! It's really not that difficult; all you gotta do is follow the recipe. 


Challah, from the Bread Baker's Apprentice, by Peter Reinhart 
Makes 1 large braided loaf, 2 smaller loaves


Ingredients:
4 cups unbleached bread flour
2 tablespoons  granulated sugar
1 teaspoon salt
1-1/3 teaspoons  instant yeast
2 tablespoons vegetable oil
2 large eggs, slightly beaten
2 large egg yolks, slightly beaten
3/4 cup plus 2 Tbsp to 1-1/8 cups  water, at room temperature
2 egg whites, whisked until frothy, for egg wash


Directions:
Stir together the flour, sugar, salt, and yeast in a mixing bowl (or in the bowl of an electric mixer). In a separate bowl, whisk together the oil, eggs and yolks, and 3/4 cup plus 2 tablespoons water. Pour the egg mixture into the flour mixture. Mix with a spoon (or on low speed with the paddle attachment) until all the ingredients gather and form a ball. Add the remaining water, if needed.


Sprinkle flour on the counter, transfer the dough to the counter, and knead for about 10 minutes (or mix at medium-low speed for 6 minutes with the dough hook), sprinkling in more flour if needed to make a soft, supple, but not sticky dough. The dough should register approximately 80°F (27°C).


Lightly oil a large bowl. Form the dough into a boule and transfer into the bowl, rolling it around to coat it with oil. Cover the bowl with plastic wrap. Ferment for 1 hour at room temperature. Remove the dough from the bowl and knead for 2 minutes to degas. Re-form it into a ball, return the ball to the bowl, cover with plastic wrap, and ferment for an additional hour. It should be at least 1-1/2 times its original size.


Remove the dough from the bowl and divide it into 3 equal pieces for 1 large loaf, or 6 pieces for 2 loaves. (Or, for a celebration challah, divide it into 3 equal pieces and combine 2 of those pieces and form them into 1 large dough. Take this larger piece and divide it into 3 equal pieces. Take the smaller dough and divide it into 3 pieces as well; in the end, you will have 3 large pieces and 3 small pieces.) Regardless of the size of the loaves you decide to make, form each of the pieces into a boule, cover them with a towel, and let them rest on the counter for 10 minutes.


Roll out the pieces into strands, each the same length, thicker in the middle and slightly tapered toward the ends. Braid them using the 3-braid method. Line a sheet pan with baking parchment and transfer the loaf or loaves to the pan. Brush the loaves with the egg wash. Mist the loaves with spray oil and cover loosely with plastic wrap or place the pan in a food-grade plastic bag.


Proof at room temperature for 60 to 75 minutes, or until the dough has grown to 1-1/2 times its original size.


Preheat the oven to 350°F (175°C) (325°F (160°C) for the celebration challah) with the oven rack on the middle shelf. Brush again with egg wash and sprinkle sesame seeds on top. Bake for 20 minutes. Rotate the pan 180 degrees and continue baking for 20 to 45 minutes, depending on the size of the loaf. The bread should be a rich golden brown and register 190°F (88°C) in the center. When done, transfer the bread to a rack and cool for at least 1 hour before slicing or serving (or, if you're impatient like me, wait 10 minutes and slice it, shape be damned).

Sunday, 13 May 2012

Costello's Famous Sour Cream Pound Cake

It's Mother's Day! What's everyone doing for their moms today? My day has been pretty full so far. Got up this morning and started on an epic lunch for mom. We made oxtail with peanut sauce, stir fry eggplant and bok choy, Jamaican festivals and rice. And also a calzone for my brother, who doesn't eat anything remotely interesting unless you have the patience to push it on him for years until he gives in.


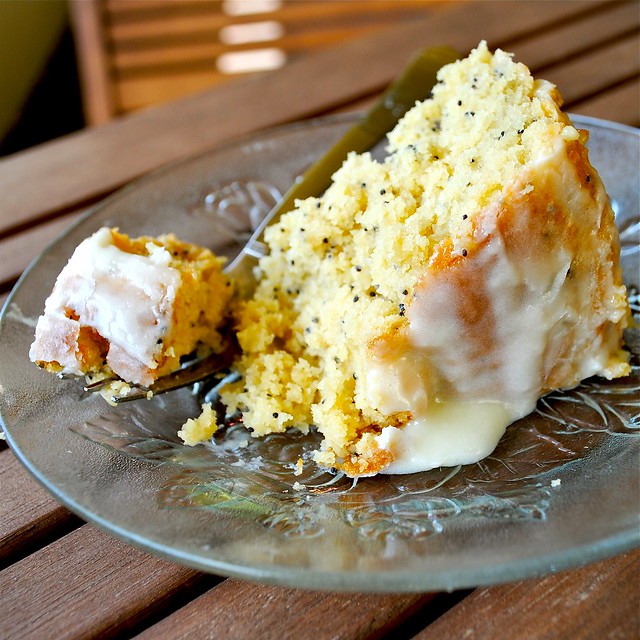
And for dessert? Well, mom loves her pound cake. We have an old recipe from a family friend that is our absolute favourite way to make pound cake. Seriously. Whenever we make pound cake, it's a crime to use any other recipe that's not this one. Just look at it:


Stains = proof of deliciousness, if you ask me. If a recipe is dyed a different colour with food and time, that is a recipe to keep. It uses sour cream instead of milk, which makes it so very moist. It also gives it a nice tart taste that cuts through the richness. Also: cream cheese frosting = always. Any cake (or anything) I can get cream cheese icing on gets cream cheese icing. Pound cake is no exception. I may even be starting to convert mom from buttercream, which is saying a lot.

This cake is so easy to make. It's literally just mixing wet and dry ingredients together. But, man, does it taste amazing! If you guys ever need a simple, quick cake to make someone that tastes like all the love and appreciation you have for that special person, make this.


To all the mothers out there and to all of their dutiful kids who worked hard today to show their love for said moms: HAPPY MOTHERS DAY! Eat awesome food and go to sleep stuffed to the gill!

Costello's Famous Sour Cream Pound Cake
Ingredients
• 1 cup packed brown sugar
• 1 cup white sugar
• 1 cup unsalted butter, room temperature
• 2 1/4 cups all purpose flour
• 1 heaping tbsp baking powder
• 1/2 tsp salt
• 3 eggs
• 1 cup sour cream
• 1 tsp vanilla
• 2 tsp lemon extract
• 1 tsp orange extract
• 1/4 cup poppy seeds

Directions
Preheat the oven to 325F and grease a bundt pan (mine was the standard 10"). In the bowl of a stand mixer (or in a medium sized bowl) cream the butter and sugar together until light and fluffy (about 3-5 minutes). In another bowl, mix flour, salt and baking powder. Add 1 cup of the flour mix, 1/3 cup of sour cream and 1 egg to the butter and sugar.

Mix until incorporated. Add the vanilla, lemon extract, orange extract and poppy seeds. Mix until uniform.

Add 1 cup of flour, 1/3 cup of sour cream and 1 egg. Mix. Add the rest of the flour, sour cream and the remaining egg. Mix until everything is smooth and uniform and you're left with a creamy batter.

Pour the batter into the prepared bundt pan, smoothing out the top. Bake for 45-55 minutes, or until an inserted toothpick comes out clean. Let cool for 5 minutes, then remove from pan and place on a cooling rack. Top with cream cheese icing (recipe follows) and let it melt down the sides. Cool until you can slice it (15-30 minutes) and enjoy!

Cream Cheese Icing
• 3 tbsp butter, room temperature
• 1 cup cream cheese, room temperature
• 2/3 cup icing sugar
• 1 tbsp rum
Beat all the ingredients together until it's a smooth, thick icing.

Sunday, 29 April 2012

Doritos and Hummus

Today was my first day of summer vacation. I think I'm in shock. I woke up and thought 'okay, breakfast, then study'- I had to pause and remind myself that I have nothing left to study for! Gotta love vacation~ Though I do start MCAT studying in a week.... Still, studying for one thing is much easier than studying for five exams.

I made cassoulet last week on a whim. I'd been dying to try out such a classic recipe for a while. It was pretty awesome, but that's not what this post is about. It's about the leftover beans I had. Today, they were staring at me, so I decided to put them out of their misery and made 'em into a hummus!
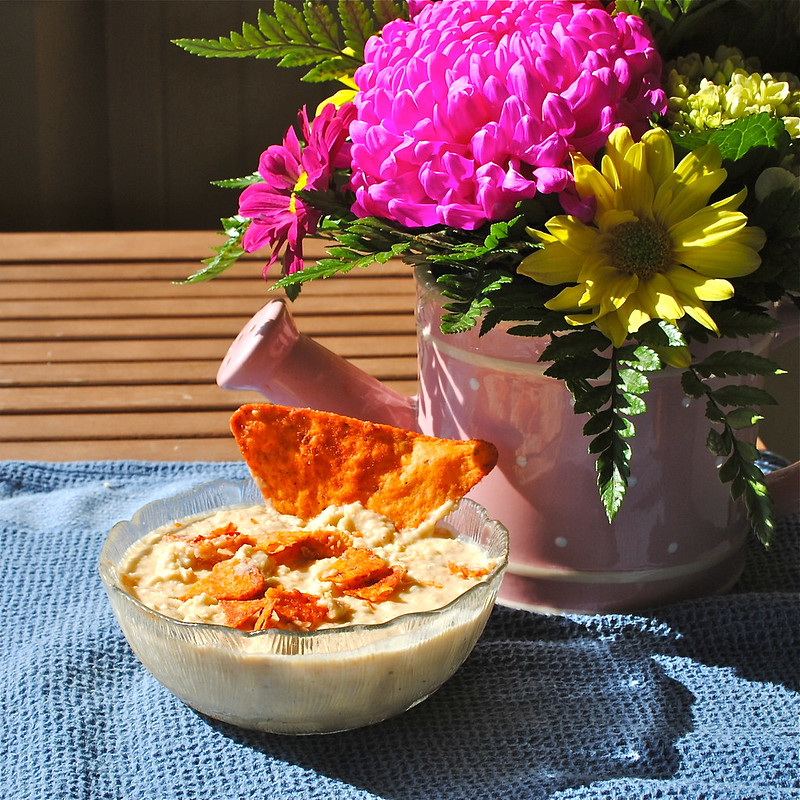
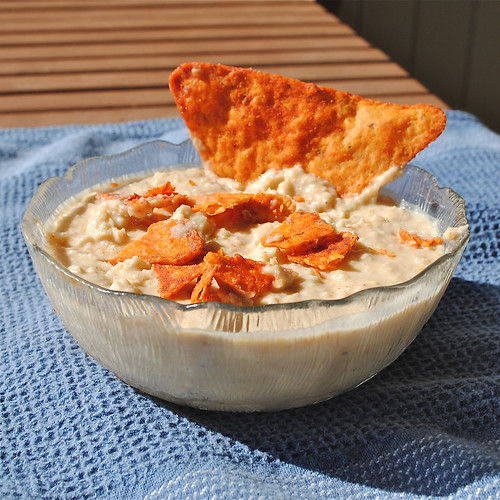
I started out using a recipe from a cookbook, but ended up ignoring it and just going with what I had on hand. Turned out pretty delicious, if I do say so myself! Even better: I had just bought those new BBQ Chipotle Doritos. Now, I didn't really think it through when I grabbed the bag in order to use some chips for the pictures... Then I was cleaning up and tried the chips with the hummus...

OH MAN. It was so good. The spiciness of the chips was cooled by the hummus, which I left a bit chunky so it gave it some texture with the crunch of the chip. It was awesome. If you can't find the BBQ Chipotle Doritos, the Jalapeño Cheddar Doritos would work great as well. Either way, try to stick with a spicy chip- trust me, it's awesome.

Phenomenom Hummus
Makes about 1 1/2 to 2 cups
Ingredients
• 1 cup canned white kidney beans
• 1 cup canned chickpeas
• 3 cloves of garlic
• 1/3 cup of water
• 1 tbsp lemon juice 
 1 tsp salt
• 1 tsp hot sauce
• 2 tbsp tahini 
• salt to taste

Directions
Drain and rinse the canned beans, shaking off excess water. Place in a food processor with the garlic, water, salt, lemon juice and hot sauce. Blend until just shy of smooth; leave it a tiny bit chunky.

Add tahini and blend once more to incorporate. Add salt (and lemon juice or hot sauce) to taste. If it's too thick, add more water. If it's too thin, add more beans (you'll probably have some leftover from the cans) or tahini. 

Serve with BBQ 
Chipotle Doritos and enjoy~

Saturday, 28 April 2012

Daring Bakers: Armenian Nutmeg Cake

The Daring Bakers’ April 2012 challenge, hosted by Jason at Daily Candor, were two Armenian standards: nazook and nutmeg cake. Nazook is a layered yeasted dough pastry with a sweet filling, and nutmeg cake is a fragrant, nutty coffee-style cake.
Holy cow, what a month. I feel like I haven't posted anything in ages! I have finals to thank for that. 5 exams are never a cakewalk and I am proud to say that I actually spent most of my last month studying for them. Today may be an exception, but not only is it my last exam this afternoon, it's also my elective (which shouldn't really be an excuse, since the exam is worth an odd 59%, but tell that to my laziness). Either way: summer is nearly upon us!!!


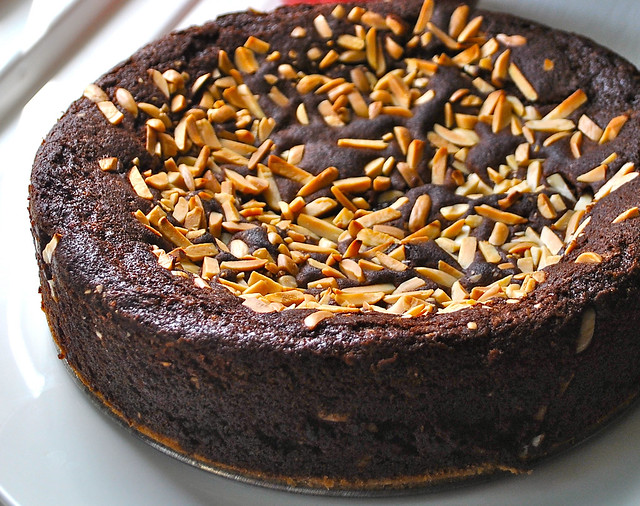
This Daring Baker's challenge was to make either nazook or an Armenian nutmeg cake (or both). I was tempted to try the nazook, but my mother intervened and requested the nutmeg cake. Either way, I knew this challenge would turn out delicious. I had leftover Easter chocolate laying around- I'm talking really good quality dark chocolate from a local store just down the street. I saw it on the counter and thought: 'why not?'. When is chocolate ever a bad thing to include in a dessert anyway? It gave the cake a deep, rich colour and a slight bitterness to counter the sweetness of the cake. I also went almonds instead of walnuts, mostly because I was watching Sugar at the gym and she made an almond cake a bit similar to this one, so I had a hankering. 

This recipe was really neat. I liked how they first used the batter to make a crust before adding the wet ingredients for the cake part. Really cool way to do it and the added crunch at the bottom gave it texture (I admit that I may have enjoyed the crust more than the actual cake... but I'm backwards like that) and a nutty taste.

Make sure to be careful with that nutmeg. This is a nutmeg cake, but when the recipe says 1 to 1 1/2 tablespoons, don't go generous with 2. Nutmeg is really potent and can go wild if you put just a bit too much in. 


I really enjoyed this challenge- I had a lot of fun making the cake and I always am excited to try out different cultural dishes. It makes me feel like I've expanded by baking repertoire! My mother absolutely loved the cake (she ate two slices the day I made it) and suggests having it with a cup of tea. 


Armenian Nutmeg Cake
Makes one 9”/23cm cake which yields 12 servings
Ingredients
  •   1 cup milk (I used 2% but any kind of milk would work)
  •   1 teaspoon baking soda
  •   2 cups all-purpose flour
  •   2 teaspoons baking powder
  •   2 cups  brown sugar, firmly packed
  •   3/4 cup unsalted butter, cubed
  •   2/3 cup almond pieces (or any one of your favourite nuts)
  •   1 to 1-1/2 teaspoons ground nutmeg
  •   1 egg 
  •  2/3 cup dark chocolate
Directions:
  1. Preheat your oven to moderate 350°F.
  2. Mix the baking soda into the milk. Set it aside.
  3. Sift together the flour and the baking powder into a large bowl. One sift is fine.
  4. Add the brown sugar and stir.
  5. Toss in the cubed butter and mash the butter with a fork or use your fingers to incorporate it into the dry ingredients. You want to get a more-or-less uniform, tan-coloured crumbly mixture. 
  6. Take HALF of this resulting crumbly mixture into your springform (9”/23cm) pan. Press a crust out of it using your fingers and knuckles. 
  7. Melt your chocolate- I always use a double broiler to do this: place a small pot on the stove on medium heat, filled with about an inch of water. Fit a glass bowl on top of the pot so that it sits in the pot, but doesn't touch the water. Add your chocolate to the glass pot and let it melt, stirring with a spatula every so often. Once the chocolate is almost melted (just a few chunks left), take it off the heat and stir until it's smooth.
  8. Crack an egg into a mixer or bowl. Add the nutmeg and start mixing slowly with a whisk attachment and then increase to medium speed (you can also mix by hand).
  9. Once it's mixed well and frothy (about 1 minute using a standing mixer, or about 2-3 minutes of vigorous beating with a whisk), pour in the milk and baking soda mixture. Continue to mix until uniform. Add in the melted chocolate. 
  10. Pour in the leftover crumbly mixture. Mix well, with either a paddle attachment or by hand with a spatula or whisk. The resulting mixture is thick, but still liquidy
  11. Pour the batter over the base in the springform pan. Sprinkle with the almond pieces. 
  12. Bake in the preheated oven for about 30-40 minutes. You'll know it's done when the top is a golden brown, and an inserted toothpick comes out clean. Allow to cool in the pan, and then release. Enjoy!