Wednesday, 14 November 2012

Daring Cooks: Brined Roast Chicken

Audax of Audax Artifax was our November 2012 Daring Cooks’ host. Audax has brought us into the world of brining and roasting, where we brined meat and vegetables and roasted them afterwards for a delicious meal!

So I've been pretty busy these last few months. I feel guilty. I haven't updated in ages, but in my excuse, I just started my fourth year of university. My undergrad has just flown by. I'm also doing a thesis project at the St. Joseph's Lawson Health Research Institute (what a mouthful). I'm working with Dr. O'Gorman and his two PHD students Christina and Justin. The focus of the lab is Dupuytren's Disease. I won't bore you with the scientific details, just know that it's a lot of work!

Anyway, this month's Daring Cooks challenge was one that was perfect for the cool fall weather. My mom swears by brining her turkey. It makes the meat succulent, moist and tasteful. I did my first solo brine over the summer using Anthony Sedlak's recipe and it was so good my roommate asked me to make it for her this month.

Brining may seem like a lot of work, but it's really simple. You just have to make what is, essentially, salty water and soak the meat in it. Not too hard, right? And the payoff is huge!

As I said before, I used Anthony Sedlak's brined chicken recipe from his book, the Main. I modified it a bit, but it's a great recipe for anyone willing to try this awesome technique out!


Anthony Sedlak's Brined Roast Chicken
Adapted from The Main, by Anthony Sedlak
Ingredients
Brine:
•3 cups water
•3 cups white wine
•1 stalk celery, roughly chopped
•1/2 onion, roughly chopped
•10 cloves garlic, peeled and smashed
•2 teaspoons whole peppercorns
•3 bay leaves
•3 springs of rosemary
•2 sprigs of thyme (or 2 tsp dried thyme)
•1/4 cup salt
•1/4 cup sugar
Chicken:
•1 3-3.5 lb chicken
•2 cloves garlic, thinly sliced
•2 sprigs rosemary
•4 sprigs thyme
•1/4 cup softened butter
•1 onion sliced into 1/4 in rings
•2 large carrots, chopped into 1" pieces
•2 bulbs garlic, tops cut off lengthways
•3 medium potatoes (white or sweet), chopped into 1" cubes
•1/4 cup olive oil
•salt and pepper

Directions
For the brine: combine all the ingredients in a pot and bring to a boil. Let cool to room temperature. Place chicken in a pot or roasting pan big enough to hold the chicken and the brine. Cover the chicken with the brine, weighing it down if you need to. Place in the fridge overnight.

Roast chicken: Preheat oven to 400C. Remove chicken from brine and pat dry. Strain brine, reserving solids. Smear half the butter and the sliced garlic under the breast skin. Tuck fresh herbs and brine solids (onion, celery garlic cloves, etc) inside before trussing chicken.

Rub remaining butter into skin and season generously all over with salt and pepper. Arrange onion slices, carrots, garlic and potatoes on a lightly oiled roasting pan. Place chicken on top. Roast in the oven for about 1 hour or until juices run clear. Rest for at least 15 minutes before carving.

Tuesday, 14 August 2012

Daring Cooks: Cornmeal

Rachael of pizzarossa was our August 2012 Daring Cook hostess and she challenged us to broaden our knowledge of cornmeal! Rachael provided us with some amazing recipes and encouraged us to hunt down other cornmeal recipes that we'd never tried before – opening our eyes to literally 100s of cuisines and 1000s of new-to-us recipes!


Now that the Olympics (and my MCAT) is done my life felt a bit empty- until I realized I have to get started on my med-school applications. Damn it. Talk about stressful! I want to just close my laptop and hope it sorts itself out. Can't you hire people to do this for you? I wish.

The best way to ease stress? Cooking. And this month's Daring Cook's challenge provided the best distraction. I love cornmeal- so many good things come from it, like cornbread, Jamaican patties, Jamaican festivals, Chicago pizza.... Etcetc. It's such an awesome ingredient- I was totally excited to use it in this month's Daring Cook's challenge.

At first I wanted to do a twist on cornbread, but then decided to do something more along the lines of Jamaican cuisine. At first I wanted to try making Jamaican festivals- deep fried fritter thing. Absolutely delicious. We had them last time I was in Jamaica and my friend and I became totally obsessed. However, when I tried to make them it didn't come out so well so I decided to try something a bit less tricky (for now).

So my mom and I settled on doing a corn fritter- stuffed full of jerk chicken. Hells. Yeah. Stupidly easy to make, tasty and filling- a great Sunday brunch with just enough spice. For something thrown together willy-nilly it came out pretty great, if I do say so myself.

Jerk Chicken Cornbread Fritters
Makes 6 fritters
Ingredients
1 cup all-purpose flour
1/2 cup yellow cornmeal
2 teaspoons baking powder
1 tsp jerk seasoning
2 tablespoons butter, melted
2 eggs
1 tsp salt & pepper
1⁄2 cup buttermilk
3/4 cup jerk chicken (I used this recipe)
1 bunch green onions
2 tbsp oil for frying

Directions
Mix flour, cornmeal, baking powder, jerk seasoning, pepper and salt in a large bowl. In another bowl, combine eggs, butter, and buttermilk. Add to the dry ingredients and stir until just combined. Fold in the jerk chicken and green onions. Divide into 6 patties.

Heat a skillet over medium high heat. Fry each patty until golden brown- about 3-4 minutes a side. Drain on a paper towel. Serve hot with your favourite topping (I suggest mayo + hot sauce). Enjoy!

Monday, 6 August 2012

Graham Cracker Cake with Chocolate Covered Banana Chips

Hooooo-leeeee cow. What a couple of months it's been. July didn't even exist for me. It was just a blur of hot weather, humidity, studying and Supernatural. I had my MCAT last Friday, which was, honestly, the hardest exam I have ever taken in my life. Halfway through (it was a 4 hour exam) by eyes were blood shot. I got home and nearly collapsed on the couch. But! It's over and now I can finally relax and enjoy the summer fully! All there is left now is to wait for my mark and pray that it was enough!

So, I decided that, with the MCAT finally over, I deserved a cake. Hell, I deserved a cake and a whole lot of booze, but I figured I'd start out with the cake. I've had this recipe in my binder for a couple years now, but have never had the chance to try it until now. I absolutely love graham crackers- don't ask me why, I just do. Sometimes, when we make s'mores I just use it as an excuse to eat the graham crackers. Yes, I know, I'm weird, but I'm okay with it.

This cake is some sort of amazing. There's no flour in it- just the crushed graham crackers. How cool is that?? The original recipe, from Style at Home, had a whipped cream frosting- but you guys know me and my cream cheese frosting, so I had to use that instead. That, and I tweaked it one other way: I added chocolate covered banana chips. Holy crap, it was a stroke of genius, I tell you. The crunch from the banana gives the cake another layer of textural awesome, plus the hint of chocolate and banana is just addictive. I put the chips in the cake and in the cream cheese. Fantastic.


The cake is almost gone, but not because I ate it all alone (thankfully). Even my brother thought it was amazing, which is saying something since it has a minimal amount of chocolate in it! Though, we all agreed in saying the taste reminds us of a carrot cake for some reason, even though there's no carrot in it at all. I think it's from the molasses in the graham crackers plus the cream cheese frosting. Honestly though, I dunno why but it does taste like a carrot cake. Which means it tastes freaking delicious. All the awesome of graham crackers in a super mouthwatering, moist cake. Perfect for the summer. I challenge you not to finish in three days.

As a side note: for any equestrian watchers out there, is anyone else out there following the story about the Canadian jumping team and Tiffany Foster's disqualification? Absolutely heartbreaking and totally uncalled for. Seriously.

To help ease my anger I eat cake. So here's the recipe!


Graham Cracker Cake
Adapted from Style at Home
Makes one 8" two layer cake

Ingredients
Cake
• 25-30 graham crackers, crumbled (about 3 cups)
• 1/2 cup unsweetened shredded coconut
• 2 1/2 teaspoons baking powder
• 1 stick (1⁄2 cup) unsalted butter, at room temperature
• 1 cup sugar
• 4 eggs, separated
• 1 teaspoon vanilla extract
• 1 cup milk
• 1/8 teaspoon cream of tartar
• 2/3 cup chocolate covered banana chips, chopped

Cream Cheese Frosting
• 8 ounces butter, at room temperature
• 8 ounces cream cheese, at room temperature
• 2½ cups powdered sugar
• 1 tablespoon vanilla extract
• 1/3 cup chocolate covered banana chips, crushed
• 1/2 tsp banana extract

Directions
For the cake:
Preheat the oven to 350F. Grease two 8" circle cake pans and line the bottom with parchment paper.

In the food processor, pulse the graham cracker crumbs and coconut until very fine. Add the baking powder and pulse until combined. Transfer to a bowl and set aside.

With the mixer on medium-high speed, cream the butter and sugar until smooth. Scrape down the sides of the bowl occasionally.Add the egg yolks, two at a time, beating for 1 minute after each addition, scraping down the sides of the bowl when needed. Beat until blended. Stir in the vanilla extract.

Reduce the mixer speed to low. Add 1 cup of the crumb mixture along with 1/3 cup of milk and mix to blend in. Repeat until all the crumb mixture and milk are blended in.

Set up the mixer with a clean, dry mixing bowl and whisk attachment. Beat the egg whites on medium speed until frothy. Add the cram of tartar and kick the mixer up to medium-high. Beat until the egg whites form soft peaks.

Fold half of the egg whites into the graham cracker batter, folding. Add the rest and fold until blended. Spoon the batter into the prepared pans, and smooth the surface with a spatula or wooden spoon. Top each with the chopped banana chips and bake for 25 or 30 minutes, or until the cake layers begin to come away from the sides of the pan and are spingy to the touch.

Let the cakes cool in the pans for 10 minutes, then unmold onto the cake rack to cool completely.

For the frosting:
In a large bowl, beat the butter and cream cheese until smooth, about 3-5 minutes. Gradually add in the powdered sugar until blended. Add the vanilla and banana chips and fold until mixed.

To assemble:
Place one cake layer on a plate. Spread half of the frosting on top, making sure it's level. Top with the other cake layer. Cover the whole cake with the cream cheese frosting. Enjoy!!

Monday, 2 July 2012

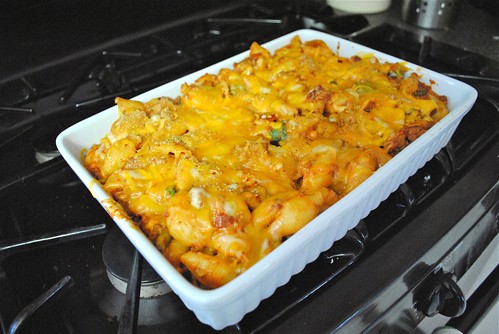
Cheeseburger Casserole

This weekend, three of my friends from elementary school came down for a visit. I've known these girls since before I even knew myself, if that makes any sense. My friend, Emily, has been with me since junior kindergarden. We counted- that's 18 years this September. It's a bit hilarious when you consider knowing someone that long- someone that's not related to you. Though after that long, they may as well be related to you.

It was an epic weekend. We saw Magic Mike yesterday, which was pretty damn good. Everything that you would expect it to be and a little bit more. I like how it was shot too (not just because of all the naked men, either). But mostly the weekend was full of acting like kids, drinking, and eating. One of the things we stuffed ourselves with was this cheeseburger casserole.


Now, this casserole was the first dish I ever made by myself. It's super simple, quick to make and cheap to buy (everyone has their own version of it, and this is hardly original, but when is there ever too much fo a good thing?). This cheeseburger casserole was an instant hit with my brother. He would tell all his friends about it, until they came over and I ended up making it for them too. Now it is sort of famous with our group of friends, which is amusing, since it really isn't that special. Or maybe it is, because of how genius it is in its simplicity. It's basically homemade Hamburger Helper. But 100000x10^10000 better. And very easy to personalize and tweak. You could probably make it taste a bit different each time you make it. Which I do, whether by accident or on purpose.

This recipe is what I use for the backbone of the casserole. However, feel free to add any of your favourite spices or condiments to it- because that's where this recipe really shines. I love adding Chinese five spice and BBQ sauce, but really, any combination would probably turn out to be amazing. I also picked shell pasta because I love how everything gets stuck inside them. Really, you could use any short pasta, but I highly recommend either shell or cavatappi. I like it spicy, but feel free to leave out the cayenne/hot sauce/jalapeño if you enjoy a milder spice.


All of my friends thought that this should have been the first post on my blog. I really have no reason as to why it wasn't other than the fact that I had no reason to make it at the time. Which is kind of silly, when I think about it. When is it ever a bad time to make CBC?

Cheeseburger Casserole (aka: CBC)
Serves 6
Ingredients
• 6 cups uncooked shell pasta
• 6 strips bacon, cut into cubes
• 1 lb ground beef
• 1 Italian sausage, casing removed
• 2 cloves garlic, minced
• 1 can condensed tomato soup
• 1 green onion, chopped
• 1 tbsp Italian seasoning
• 1 jalapeño pepper, chopped
• 1 tsp cayenne pepper
• 3 cups shredded cheese (use a strong cheese, like cheddar or Monterey Jack)
• Hot sauce and salt and pepper to taste

Directions
Grease a 9x13" casserole dish and set aside.

Boil a pot of salted water and cook pasta until al dente. Drain and set aside

Meanwhile, in a medium pan over medium heat, cook bacon pieces until crispy. Set aside on a paper towel and drain the pan. Cook the garlic, sausage and beef in the same pan, breaking the sausage up into smaller pieces until all of the meat is browned. Add in the green onion, spices, Italian seasoning and pepper and stir to combine.

Set your oven to broil. Combine the pasta, beef and bacon in a large bowl (the bowl you cooked the pasta in, if it's big enough). Add the tomato soup and 1 cup of cheese. Stir to combine. Add hot sauce, salt and pepper to taste. Pour into the prepared pan and top with the rest of the cheese.

Broil on high for 3-5 minutes, or until the top is bubbly and golden brown. Remove from the oven and enjoy.

P.S. This can easily be prepared ahead of time and set in the fridge even a day before. Just cook it in a 350F oven for 15-20 minutes, then broil on high for 3-5 minutes.

Thursday, 28 June 2012

The Baker's Apprentice: Potato Rosemary Bread

Oh man, I thought that with summer I'd have more time to post things here and more chances to practice taking pictures. So much for that! I can't entirely blame MCAT studying, because though it does take up a hell of a lot of time, I think it just comes down to summer laziness. Which is fine, right? I mean, it is summer (finally. The heat has set in. In true London style, it's been sunny, hot and humid for the last week, with random days after storms when its cool. Gotta love it!).

I meant to bring my camera with me last weekend down to Victoria Park- it was the first food festival of the summer. So many good eats and I wanted to share it, but, unfortunately, I'm forgetful. I didn't remember until I was at the fest. But fear not! Since there is practically a food fest every other weekend during the summer, I'm sure I'll have another chance to grab some pictures.

It was a pretty awesome festival though, I must say. With food ranging from American pizza, to Jamaican ox-tail and everything in between. There were lots of Korean and Vietnamese vendors, as well as a few Caribbean ones as well. I had to go for curry goat with rice a peas. It was just pure Jamaican deliciousness. Made me wish I was in Jamaica still (where it probably would have been cooler).

A few of my old elementary school friends are coming up for a visit this weekend and I am ready for a huge foofaraw! We're having a slumber party Sunday. Which is basically just a cute way of saying we're going to get wasted. Still, there will be lots of eating involved as well. The point is, Monday I wanted to do a breakfast bake, since I could just prepare it the day before and leave it overnight. Which brought me to baking bread, since this is my last week not cramming MCAT into my head. And of course, when going for bread, I turned to my Baker's Apprentice cookbook, since I am determined to try every recipe he has, and chose his potato rosemary bread simply because I had Ontario potatoes lying around.


I even made my own mashed potatoes. Seriously guys, the better your mashed potatoes taste, the better this bread will taste. Mine was full of garlic, green onions, butter and parmesan cheese and the bread tasted awesome. I had to make sure not to eat half the loaf off (like I usually do).

The recipe makes enough for two regular sized loaves, so you could definitely do what I did and use half for a casserole, or even freeze it for later! It does take some preparation, what with having to make the biga (a starter) the night before, as well as letting it rise for a total of 4 hours. But dude, it is very much worth it. Especially if you make it on a day when you're just lazing around the house anyway (though I did do some cleaning while I let it rise, so it wasn't so much as lazing as procrastinating studying).

I used the recipe straight from the cookbook, so if you have a copy, this is me highly suggesting you try the potato rosemary bread next time you open it up. If you don't have The Baker's Apprentice, you can go buy it (here, or here, for Canadians)- which I highly suggest you do. So far, it's been one of the best purchases I've made this summer!- or you can find the recipe online. I love Brown Eyed Baker, so I'd suggest checking out her version here.

Either way, I hope you guys go for it and enjoy it as much as I did! Make it for your family, friends, loved ones or just for your awesome, gluttonous self. NOTHING SAYS I LOVE YOU LIKE A LOAF OF FRESHLY BAKED BREAD.

Thursday, 14 June 2012

Daring Cooks: Salmon Cannelloni

Manu from Manu’s Menu was our Daring Cooks lovely June hostess and has challenged us to make traditional Italian cannelloni from scratch! We were taught how to make the pasta, filling, and sauces shared with us from her own and her family’s treasured recipes!


Oh hells yeah, we're doing cannelloni this month! I love pasta and cannelloni is an awesomely satisfying dish that looks impressive but really isn't all that difficult to make. I've been bad these past couple months and haven't had time to do the Daring Cooks challenge, so I made sure to get my butt in gear this month. And, come on, it's cannelloni. No complaints here.

I wanted to do something healthy and low in fat and calories, since it is summer and everyone is trying to lose weight and get into that beach-ready state. I should probably join them in their endeavors, and what better way than making a delicious pasta casserole that's actually good for you?


So this is my cannelloni contribution. I used low fat ricotta in the filling and mixed it with canned salmon and local spinach and peppers (I even resisted topping it with 10000 cups of cheese). Yeah, it was as delicious as it sounds. Though it being low calorie and all, you have to restrain yourself from arguing that that means you can eat half of it.

Salmon Cannelloni
Ingredients
• 2 cans of salmon, drained
• 1/2 cup of low fat ricotta
• 1 red pepper, chopped
• 1 cup spinach, chopped
• 2 cloves garlic, minced
• 1 tsp olive oil
• 18 tubes of cannelloni (depending on the size of cannelloni. I used small tubes)
• 2 cups of your favourite tomato sauce
• 6 slices provolone cheese (about 1/2 cup shredded)

Directions
Preheat oven to 350F.

Heat olive oil in a small skillet over medium heat. Add garlic and sauté for 1 minute. Add spinach and cook until wilted. Season to taste with salt and pepper.

Flake salmon into a medium sized bowl. Add ricotta, red pepper and spinach. Season to taste with salt and pepper. If you find it's too dry, add more ricotta (or, if you want, you can use 1 egg).

Spread 1/2 cup of the tomato sauce over the bottom of a 9x13" casserole dish. Using a small spoon (or a piping bag, if you've got the skills), fill the cannelloni tubes, placing them in rows on top of the tomato sauce. Once all of the tubes are filled, top with the remaining tomato sauce. Spread cheese slices on top.

Bake, at 350F, for 20 minutes. Then, turn on your broiler to high and broil for 2-3 minutes, or until the cheese is golden and bubbly. Enjoy!

Thursday, 31 May 2012

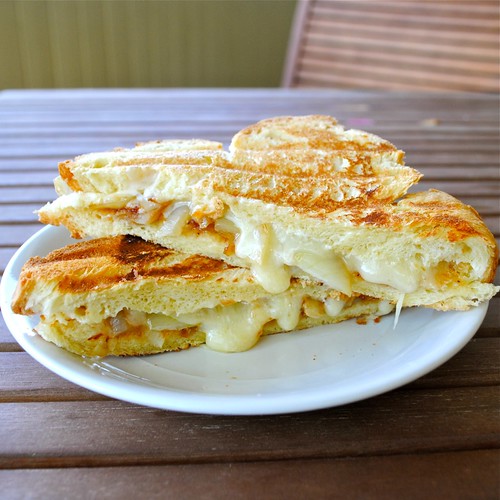
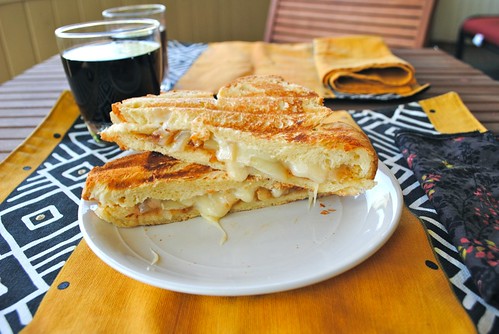
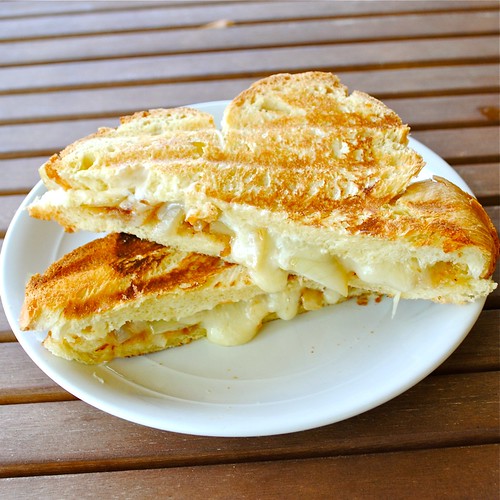
Papaya Chutney Grilled Cheese

I think I'm a little late jumping onto the whole grilled cheese bandwagon- especially since its national month has already come and gone. Still, better late than never, right? Especially when you have homemade bread to submerge in cheese.


Is it just me or has grilled cheese become even more amazing over the past year? The different combinations of ingredients and flavours I've seen the food community chug out make my mouth water. I want to try all of them! I mean, just think back to when you were a kid and grilled cheese meant just two slices of white bread with kraft cheese. Not like there's anything wrong with that (best hangover cure, if you ask me). But now, I'm seeing sloppy joe grilled cheese, guacamole grilled cheese, even chocolate parmesan grilled cheese (now that I have to try).

I guess that just goes to show how even the simplest, most nostalgic dishes can be made into an explosion of culinary creativity. And that's just poetic. So here's my contribution: a mouthwatering, savoury combination of Caribbean chutney, sharp cheddar and caramelized onions, all on homemade bread. I came upon papaya chutney on my last day in Jamaica. My mom wanted to get rid of her last few hundred Jamaican dollars and told me to pick something to bring home. I spotted the papaya chutney and thought: 'now that sounds good'. I was wondering what it would taste like- whether it would be sweet or tangy- when I first did try it I was surprised. It has the almost same sort of taste as caramelized onions, but it's more savoury than sweet. The sweetness kicks in just a bit to give it a unique, addictive taste. This is the first time I've used it in a recipe, but, man, did it deliver! If you can find papaya chutney, buy it! It's the kind of ingredient that makes you want to experiment.


Papaya Chutney Grilled Cheese
Serves 2
Ingredients
• 4 slices of your favourite bread
• 1 medium onion, halved and sliced
• 1 tbsp olive oil
• 1 tsp balsamic vinegar
• 2 tbsp papaya chutney (can be found at your local Caribbean store or Asian market. If you can't find it, I suggest using tomato chutney or any other savoury spread)
• 6 slices old cheddar
• 1 tbsp butter or margarine, softened
• 1 tbsp mayonnaise

Directions
Heat oil in a small frying pan over medium heat. Add onions and sauté until translucent, about 5-7 minutes. Turn the heat down to medium-low and let caramelize for 5-10 minutes, or until a deep golden. Add balsamic vinegar and cook for 1-2 minutes more. Remove from heat and set aside.

Mix together the butter and mayonnaise in a small bowl. Set aside.

Spread 1 tbsp of papaya chutney on 1 slice of bread. Top with half of the caramelized onions and 3 slices of cheese. Close the sandwich with another slice of bread. Repeat with the second sandwich.

Heat a skillet at medium heat. Spread the butter/mayo mixture on the outside of each sandwich. Pan-fry on each side until the bread is golden brown and the cheese is gooey and amazing, about 2-3 minutes per side. Remove from heat and enjoy.