Tuesday, 28 February 2012

Lolivya Banana Cake

My Histology professor called Reading Week 'Slack Week'. I admit I chuckled at that when he first wished us a good vacation... Turns out I did much more slacking than reading.

But really, can you blame me? I was down in Port Antonio, Jamaica, with my best friend and family. It's where my mom grew up and I hadn't been there for 8 years. That and, coming from a Canadian winter, it was a paradise. I think my favourite things I ate down there were the fruit. You just don't get them so fresh up in Canada. The bananas literally blew my mind.
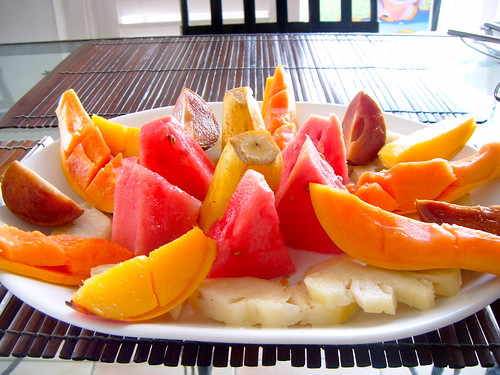

Every morning we'd have a plate of fruit (bananas, pineapple, mango, watermelon, jackfruit... all amazing), Blue Mountain Coffee, hardough bread and Guava jelly.... Plus something hot, like scrambled eggs (or even pancakes! My uncle did it for us Canadians). 

One morning, my Uncle Jim even went to a Belgium bakery and delivered these too all the villas:
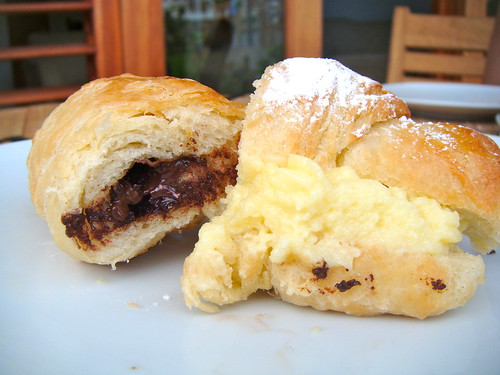

The one on the right is a croissant filled with chocolate and the left is custard. The custard was so, so good. Mostly because their eggs are fresh and organic (no preservatives down there!). And they were baked fresh that morning, still warm. This is why I gained weight, haha. And also, probably most likely, because we had amazing meals the whole week. We got jerk three times. Jerk chicken, pork, and sausage. With festivals.

Oh man, festivals. They were the best thing I was introduced to down there. They're like fritters almost, just they're made into logs. A dough with cornmeal that's deep fried into amazing goodness. The best we had were from Mr. Glasses. They were thick and crispy on the outside and soft on the inside. One batch we tried at Frenchman's Cove had cinnamon in it, which was a nice touch. 


Those glasses are filled with delicious Jamaican rum, pineapple juice and Ting. The plate in the center has festivals. Far corner is jerk chicken and the closest plate is jerk pork.

Now, I couldn't leave Jamaica without baking something with those amazing bananas. And what better to make than a banana cake with cream cheese frosting? Well, a banana cake made with Jamaican bananas and Canadian maple syrup, actually. 
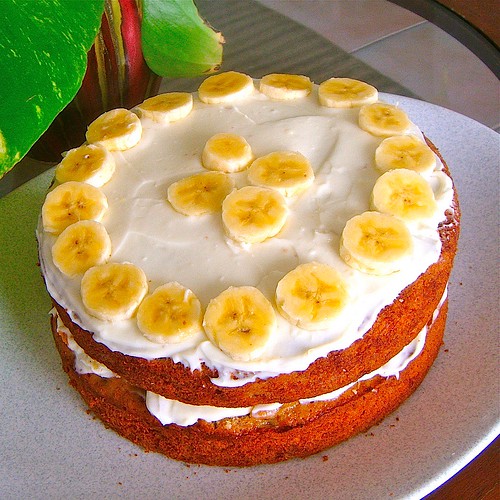

It. Was. Amazing. If I do say so myself. Everyone had seconds. The cake is very moist from the maple syrup. Absolutely addictive. I named it after my uncle's first villa, Lolivya (which translates to: 'Lowes Live Here', my mother's maiden name being Lowe) since I have so many amazing memories there and because it is my home away from Canada. It's really a beautiful cake and if, like me, you live in North America and can't necessarily get fresh Jamaican bananas, just do your best to find the most delicious, ripe bananas you can. I promise it'll still taste amazing.
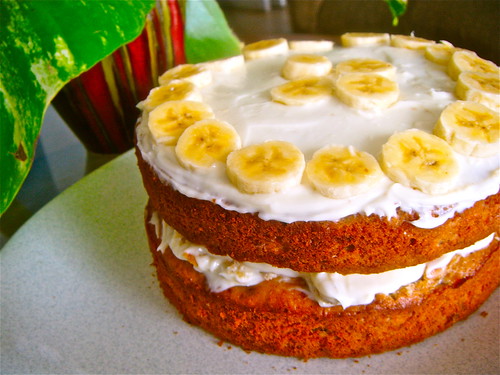


Lolivya Banana Cake with Cream Cheese Icing
Ingredients
For the cake:
  • 6 ripe bananas, mashed (about 1 1/2 cups)
  • 3 cups all purpose flour
  • 1 1/2 tsp baking soda
  • 1 tsp salt
  • 1 cup 100% pure maple syrup 
  • 1 cup icing sugar
  • 3/4 cup butter, room temperature
  • 1/2 cup buttermilk
  • 3 eggs
  • 1 tbsp vanilla
  • 1 sliced banana for topping

Directions
Preheat the oven to 350F and grease two 8" cake pans.

In a bowl, mix the flour, baking soda and salt. Set aside.

In a large bowl (or in a stand mixer) beat the maple syrup, icing sugar and butter until light and fluffy, about five minutes. Add the eggs one at a time, beating after each addition. Add vanilla.

Add the flour mix to the wet ingredients in batches, alternating with the milk until it's a silky, delicious batter. Add the bananas. Divide the batter into the two cake pans. Bake for 40-60 minutes or until an inserted toothpick comes out clean and the cake is an awesome golden colour. 

Let cool in the pan for 10 minutes, then carefully remove the cakes and let cool completely before icing.

For the cream cheese icing:
  • 3 tbsp butter, room temperature
  • 1 cup cream cheese, room temperature
  • 2/3 cup icing sugar
  • 1 tbsp rum
Beat all the ingredients together until it's a smooth, thick icing. 

To assemble:
Place one layer of cake on a serving tray. Top with half the cream cheese icing. Place the second layer on top and cover the top with the rest of the icing. 

Right before serving, decorate with the sliced bananas (if you do this too early, the bananas may oxidize and become brown. If you want, you could mix the banana slices with lime juice to preserve their colour). 

Wednesday, 15 February 2012

Valentine's Day Sugar Cookies

Happy Valentine's everyone. This post may be a little late, but where's the harm in celebrating people you love for an entire week? That and some of us busy people may have had to reschedule our celebrations to the weekend.


Technically this is a guest post! Because I didn't actually make these myself, but my awesome friend, Steph, toiled over the oven to make these for her boyfriend and they looked so awesome I knew I had to share.

She adapted the recipe from the Joy of Baking (click for recipe) , and the only change she made was instead of making the royal icing in the original recipe, she substituted it for store-bought buttercream, which tasted awesome with the sugar cookies. It also is a nice alternative for those of us who don't have time, or can't be bothered, to make homemade icing. I always go for buttercream over traditional icing, personally.


These cookies are perfect for anyone who just wants to make a quick, simple treat that looks great. I say: go for it! See if you have the artistic talent like Steph, or just make the cookies as an excuse to practice if you're like me and weren't born with a steady hand.

Either way, these are awesome. Just look at the picture she took:


How is that not the most adorable thing ever??

Tuesday, 7 February 2012

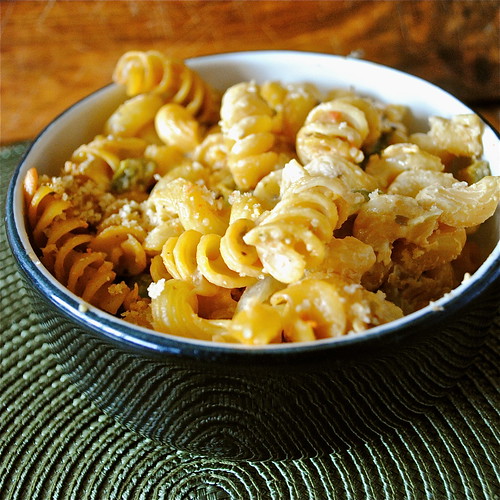
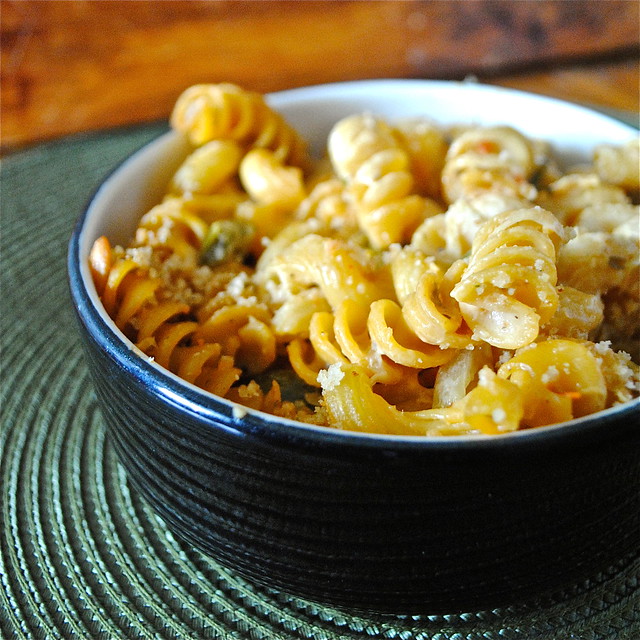
Salsa Con Queso Pasta


It's hilarious how some of the best recipes are created as a byproduct of laziness. Like this one, for example. I wanted macaroni and cheese (when is anyone NOT craving the stuff?). I was too lazy to make a cheese sauce. But I was picky in my laziness. I wanted a Mexican theme.

Then I remembered a salsa my friend bought for our New Years dinner. It was spicy, flavourful and tasted cheesy, even though it wasn't technically a cheese sauce.

So it was born. This is dedicated to parents, university students and all the lazy people out there, who want to eat something delicious, but can't be bothered to put the effort into making it. This is for you.

*Note: I only put 1/2 of a hot pepper in this because the salsa had a kick already. If you like your food with more of a roundhouse kick to the face, feel free to add the whole thing!


Salso Con Queso Pasta (aka The Lazy Delicious)
Serves 6
Ingredients
  • 6 cups of uncooked short pasta 
  • 1 tbsp olive oil
  • 1 medium onion, diced
  • 2 cloves of garlic, minced
  • 1 green pepper, diced
  • 1/2 hot pepper (Jalapeño or finger-peppers)
  • 1 tsp oregano
  • 1 400 ml jar of salsa con queso
  • 1/2 cup cheddar cheese
  • 1/4 cup Parmesan
  • 1/4 cup breadcrumbs mixed with 1 tbsp olive oil
  •  salt and pepper, to taste
Directions
Boil a pot of salted water. Add pasta and cook until al dante.

Preheat the oven to 350F. Grease a 9x13" casserole dish.

While the pasta is cooking, heat oil over medium heat. Add onion and cook until soft, about 5 minutes. Add garlic and both peppers. Cook for another 5 minutes. Add oregano, and season with salt and pepper. Remove from heat and set aside.

Once pasta is cooked, drain it before returning it to the pot. Add the pepper mixture and salsa and stir to coat. Pour into casserole dish and top with cheese and breadcrumbs. Bake, uncovered, for 20-25 minutes, or until the top is an epic golden brown.

Saturday, 4 February 2012

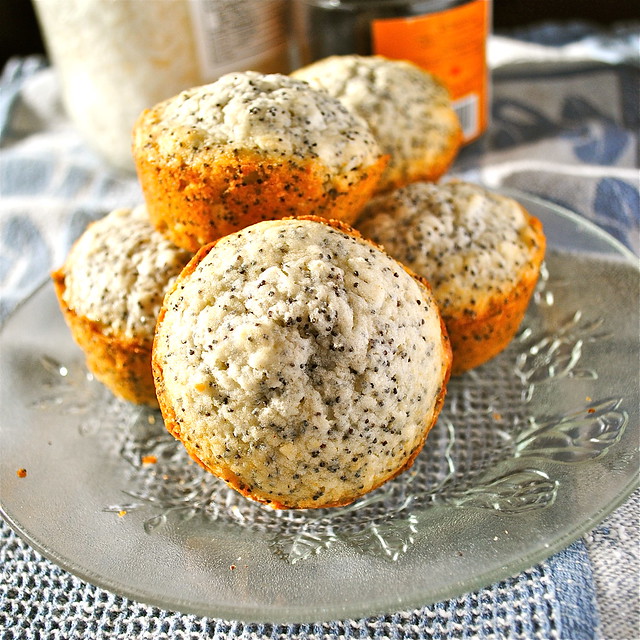
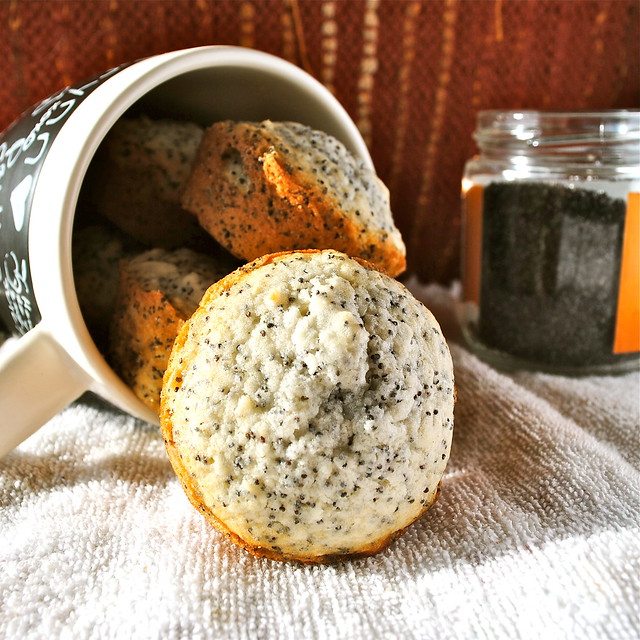
Coconut Poppy Seed Minicakes


So I was bored today (read: procrastinating) and it was the first sunny afternoon we had in a while, so I decided to throw together a quick somethin' somethin'.

I found poppy seeds in the cupboard and wanted to make a cake with it. Then I saw the muffin tins and thought, why not?

These poppy seed minicakes are soft, moist and not too sweet. I like the addition of coconut, especially since it goes so well with orange. And, well, poppy seed loves its tropics, so everyone's happy!

Feel free to put this in a 9x5 inch loaf pan and do it as one cake. Depends if you're feeling like stuffing your mouth with a whole minicake, or slicing off thick cuts.


Coconut Poppy Seed Minicakes
Makes about 24 minicakes
Ingredients
  • 2 3/4 cups of all-purpose flour
  • 1 tsp salt
  • 1/2 tsp baking soda
  • 1/2 tsp baking powder
  • 1 cup of unsalted butter, room temperature
  • 2 1/4 cups of sugar
  • 4 eggs, lightly beaten
  • 1/2 cup of poppy seeds
  • 1/3 cup of desiccated coconut
  • 1/4 cup of orange zest (about one big orange's worth, or 2 mediums)
  • 1 cup of milk
Directions
Preheat oven to 350F.

In a large bowl, sift together the flour, salt, baking soda and baking powder. Set aside. 

In another bowl or standmixer, beat together butter and sugar until light and fluffy, about 3-5 minutes. Add the eggs and beat until combined. Fold in the poppy seeds, orange zest and coconut.

Add in the flour mixture in batches, alternating between flour and milk until it's all combined. If the batter seems too dry, add a bit more milk until it's the consistency you want.

Grease muffin tins well (or loaf pan, if using). Pour in batter, filling up each tin about 3/4 of the way. Bake at 350F for about 15-20 minutes (if using loaf pan, bake for about 25-30 minutes) or until golden and a toothpick inserted in the middle comes out clean.

Cool on a wire rack for about 5-10 minutes. 

Enjoy with cream cheese or butter (actually, lemon curd would be nice too) and a nice, hot pot of tea.

Sunday, 22 January 2012

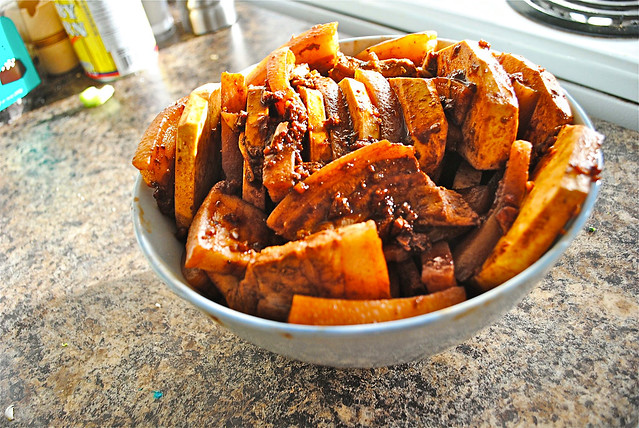
Chinese New Year Pork and Yam


First of all, gung hei fat choi everyone! This year is the year of the dragon, which, my mother claims, is supposed to be a great and prosperous year for everyone. I think we all need a bit of prosperity, yeah?

In China, they used to celebrate their wealth in the number of pigs they owned, so on Chinese new year, pork is the star. My Jah-Po is Hakka, so every year for our Chinese New Year dinner, she makes Pork and Yam, one of my most favourite Chinese dishes in the world. It really shows how simple, straightforward cooking can yield something amazingly delicious.

I got this recipe from my Jah-Po, sitting at my aunt's kitchen table, with my mother by my side translating Jah-Po's thick Jamaican accent. It's another one of those recipes that probably hasn't been written down before. It is more of a 'feel' recipe than a 'formula' one, if you know what I mean (to me, this makes it all the more special, cause the best recipes are shown and taught, not written down).

You could use pork loin instead of pork belly, if you don't want the extra fat. But, really, if you want this to be truly authentic and as tasty as possible, sacrifice your diet a bit and go for it. As my Jah-Po says, lean pork and yam is "trashy".


Pork and Yam
Serves 6

Ingredients
  • 1.5 lbs pork belly
  • 1 medium yam
  • 1 tbsp soy sauce
  • 1 tbsp molasses
  • 1 tbsp oyster sauce
  • 1 tbsp red fermented bean curd (can find at your local Asian supermarket. I used Shanghai Double Happiness)
  • 6 cloves garlic, chopped
Directions
Place pork belly in a large pot and fill with water to cover. Season with salt and pepper. Bring to a boil on medium high heat. Once water is boiling, turn the heat down to a simmer and cover. Let cook for 30 minutes.

Drain the pork and let cool. Once safe to touch, cut into 1 inch thick strips. Make sure the strips are short enough to layer later (I usually cut them about 4 inches long).

Peel the yam and cut in half width wise. Then, cut each half again lengthwise. Cut each quarter into strips, similar thickness to your pork strips.

In a large bowl, combine the rest of the ingredients to make a thick sauce. Add yam and pork and let sit for 30 minutes. After, layer the yam and pork horizontally in a large bowl, alternating between pork and yam (if your bowl isn't wide enough to fit all the pork and yam, feel free to continue with a second layer on top of the first).

Pour any leftover sauce over the pork and yam.

Fill a large pot, big enough to fit your bowl in, with about an inch of water. Bring the water to a simmer on medium low heat. Place the bowl (with your pork and yam) inside and cover with the pot's lid. Turn the heat to low and cook at a simmer for 2 hours.

Once cooked, remove the bowl from the pot. Serve immediately over rice or with good, crusty bread.

Thursday, 19 January 2012

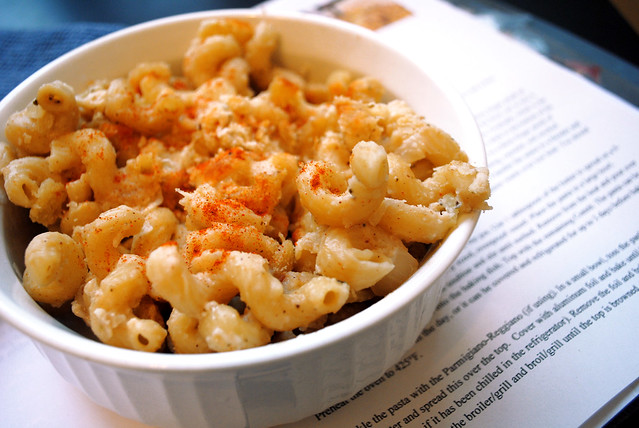
Soubise Mac and Cheese


Macaroni and cheese must be the king of all pastas, casseroles and bakes. Think about it: there aren't many people who can say they don't like it, and even less who have never tried it. There are so many ways to personalize it, adapt it and change it to fit your needs. I absolutely love it when I find a new mac and cheese recipe. I probably have over 50 between cookbooks and online blogs.

You can never have too many chocolate chip cookie recipes. Likewise, you can never have too many mac and cheese recipes either.

So here's another! Adapted and inspired by the book Ruhlman's Twenty, by Michael Ruhlman. It looks like a lot of stuff, but half of it is just seasonings.

This casserole came out beautifully. The fish sauce and wine gave it a savoury depth- you don't really taste either of the ingredients, but the pasta has a richness that is deep and satisfying. Definitely a favourite.


Mac and Cheese with Soubise
adapted from Ruhlman's Twenty
Serves 6

Ingredients
For soubise:
  • 4 tbsp butter
  • 1 medium onion, chopped
  • 2 cloves garlic, chopped
  • 3 tbsp all purpose flour
  • 1 1/2 cups milk
  • 1 tbsp apple cider vinegar
  • 3 tbsp red wine
  • 1 tbsp oyster sauce (can be found in the Asian aisle of your supermarket)
  • 2 tsp mustard
  • 1/4 tsp ground black pepper
  • 1 tsp nutmeg
  • 1 tsp cayenne
  • 1/2 tsp paprika
  • 1 tsp Frank's Hot Sauce (or your favourite hot sauce)
For casserole:
  • 6 cups dry macaroni, rotini, or cavatappi
  • 2 cups sharp, old cheddar
  • 1/4 cup Parmigiano-Reggiano
  • 1/3 cup bread crumbs mixed with 1 tbsp olive oil
Directions
For soubise: melt 2 tbsp of butter in a pan on medium heat. Add the onions. Saute for about 5 minutes, or until the onions are softened and caramelized.

In a medium saucepan over medium heat, melt 2 tbsp of butter. Add garlic and a pinch of salt. Cook for about a minute, or until butter starts to become golden. Add the flour, using a whisk to mix it with the butter. Cook until it smells toasty, 2-3 minutes.

Gradually add the milk, whisking quickly to prevent the flour from clumping. Cook until the sauce thickens, about 2-3 minutes.

Add a pinch of salt, apple cider vinegar, red wine, oyster sauce, mustard, pepper, nutmeg, cayenne, paprika and hot sauce. Add the sautéed onions and stir to combine. Transfer to a blender and puree until smooth (or puree with a hand blender).

Add the cheese, saving about 1/2 cup for topping. Stir over low heat until cheese is melted. Keep warm until the pasta is ready.

Assembly: Preheat oven to 425F.

Bring a pot of salt water to boil*. Add pasta and cook, until al dente. Drain and return to the pot. Add the soubise and stir to coat.

Grease a 9x13" baking dish. Pour the pasta into the baking dish and top with the leftover cheese and Parmigiano. Sprinkle with breadcrumbs.

Bake for 15-20 minutes, or until the cheese is a beautiful golden brown. Serve immediately.

Note*: You can start the pasta before you tackle the soubise, as long as you remember to keep watch and it while you cook the sauce.

Tuesday, 17 January 2012

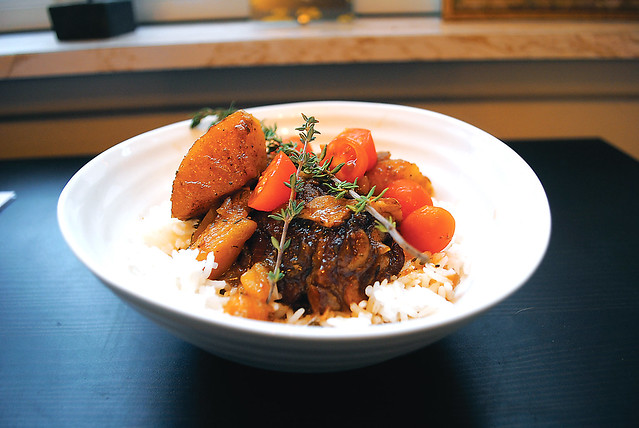
Fricassee Chicken


When I say that I grew up on this, I'm not kidding. My mom used to make fricassee chicken at least every other week. The smell of it takes me straight back to my childhood, even now. The recipe comes from my Jah-Po (grandmother), but, naturally, throughout both her and my mom's lifetimes, it went through some changes along the way.

It's one of those recipes that never touched paper, but was passed on simply by through lessons in the kitchen. When I asked my mom for the recipe, she warned me that there are no real measurements, no 'cups' or 'tablespoons'. Those are the kind of recipes I love, but I wanted to share it, so I've done my best to put it in terms that are a bit more specific than 'a bit of this and a bit of that'.

The habanero (scotch bonnet, according to my family) adds a Jamaican flavour to the dish. If you don't want it too spicy, don't pop the pepper! Or, to be safe, feel free to leave it out altogether.


Fricassee Chicken
serves 8

Ingredients
  • 8 chicken thighs, bone in and skin on
  • 1 onion, chopped
  • 2 garlic cloves, minced
  • 1/3 cup soy sauce
  • 5 sprigs of thyme
  • Pinch of ginger
  • Pinch of all spice
  • Salt and pepper
  • 1 tablespoon oil
  • 1/2 cup water
  • 1/2 cup cherry tomatoes
  • 3 medium potatoes, cut into 1" squares
  • 1 large carrot (or a handful of baby carrots), chopped into 1" cubes
  • 1 tablespoon corn starch + 1 tablespoon water
  • 1 scotch bonnet
Directions
Place thighs in a large bowl. Mix with soy sauce, onion, garlic, thyme, ginger, all spice, salt and pepper until coated.

Heat oil in a large saucepan over medium heat. Once hot, add chicken thighs, skin side down, working in batches so you don't overcrowd the pan. Sear on both sides, about 3 minutes each side.

Remove chicken from pan. Deglaze with 1/2 cup water. Return chicken to the pan along with the cherry tomatoes, onions and any sauce leftover. Cover and simmer for 20 minutes, stirring halfway through.

After 20 minutes, add potatoes, carrots and scotch bonnet. Cook for another 20-25 minutes, or until chicken is completely cooked and the potatoes are soft.

Make a slurry by mixing 1 tbsp each of water and corn starch in a small bowl or cup. Add to the pan and cook, stirring, for 2-3 minutes, or until thickened.

If you want more gravy, add more water (any type of stock would work here too).

Serve over rice (Jasmine is my favourite).