Monday, 29 September 2014

Jamaican Curry Chicken

Phew, time sure does fly, doesn't it? I feel like every time I turn around another month has passed. Summer's over and fall is just starting to set in here in London. We've been lucky and had sunny 20˚C weather for the past two weeks, but apparently that's over starting Friday!

In just three and a half months I'll be making the big move across the globe to Sydney, Australia to start medical school. I can tell ya: it's a bit stressful to plan out. I have expressed many times how I wish someone else could plan everything and I just have to okay it. But, life is rarely that simple or convenient, right?

So on days where the breeze is getting a bit cooler (and maybe you're stressing out about moving to the other side of the Earth), comfort food is a must. To me, comfort food encompasses everything from a big casserole filled with pasta and cheese, to a a simple dish of braised chicken. Today, I have a version of the latter. Behold, the Lowe's Jamaican chicken curry. My mom has been making this for my brother and I for forever, and it's never failed to make me feel warm right down to my toes. This is truly a mother-specialty and I'm super excited to share it. Ridiculously simple, enormously delicious, and perfect for those days when you just want to bury yourself in the couch and marathon TV.


Jamaican Curry Chicken
Ingredients
• 8-12 chicken thighs, bone-in and skin-on
• 1 onion, diced
• 2 cloves of garlic, minced
• 1/3 package of Grace's Coconut Cream*
• 3 sprigs of thyme
• 3 tbsp Jamaican curry powder (or regular curry powder, if you can't find Jamaican)
• 1/3-1/2 cup of water, depending on how thick you like your gravy
• 1 scotch bonnet pepper
• 2 potatoes, cubed
• Salt and pepper, to taste

*if you can't find Grace's Coconut Cream Block, use 1/3 cup of coconut milk and reduce water to 1/4-1/3 cup

Directions
In a large bowl, mix together the chicken, onions, garlic, coconut, thyme, curry, water, and the scotch bonnet pepper.

Heat a large pot over medium heat with just enough oil to cover the bottom. Add chicken thighs in batches and brown, about 2-3 minutes per side. After all the chicken is browned, add the rest of the curry mix to the pot and simmer with a lid for 30 minutes.

After 30 minutes, add potatoes. Simmer for another 30 minutes, stirring occasionally.

Once the potatoes and the chicken are fully cooked, season with salt and pepper. If you like your gravy thicker, mix together 1 tbsp of cornstarch and 1 tbsp water to make a slurry and add it to the pot. Serve over rice and enjoy!

Friday, 30 May 2014

Lemon Ginger Oatmeal Cake

It hits me how fast time flies whenever I sit down to type up a post and think: ‘It’s been that long since I’ve written anything?’. I never was very good at keeping a diary; sometimes years would pass before I remembered to write an entry. A blog is a bit easier- you can type for one thing.

It’s finally heated up here in Ontario- we were stuck in the low teens for all of April and most of May. This last week, though, has been perfect; sun, warmth, and only one or two thunderstorms. It’s glorious. My labrador retriever is certainly enjoying the summer weather- in the late afternoon he loves to lay down in a patch of sunlight on our balcony.


Today I have another adaptation of an LCBO Food and Drink recipe. I made this on a whim, mostly because I wanted to bake and we had the ingredients. I’ve wanted to try this for a while now, too. It’s a breakfast cake (though, really, cake can be eaten at any time of day), with oats and bran giving it a wholesome taste. The ginger gives it a nice kick, too. It’s great just out of the oven, but try it toasted the next day- absolutely delicious (especially if you add a dollop of ice cream). You can top it with a simple glaze or nothing at all; I had some cream cheese frosting lying around that I used to do a simple crosshatch. With only half a cup of butter, you can tell yourself this cake is healthy and have an extra big piece for breakfast. It’s the most important meal of the day, after all.


Lemon Ginger Oatmeal Cake
Adapted from LCBO Food and Drink Winter 2011
Makes 1 9” round cake

Ingredients
• 1 tbsp ginger, finely chopped (or 1 tbsp grated frozen ginger)
• 1 cup brown sugar
• 2 tbsp lemon juice
• 3/4 cup dried cranberries
• 1/4 cup dried prunes (diced)
• 1 tbsp grated lemon rind
• 1 1/2 cups all-purpose flour
• 1/2 cup bran (I used PC Fiber Cereal and buzzed it up in a food processor)
• 1/2 cup quick-cooking oats
• 1/4 tsp baking soda
• 1 1/2 tsp baking powder
• 1 tsp salt
• 1/2 cup unsalted butter, at room temperature
• 2 eggs, beaten
• 1 cup buttermilk (or substitute 1 cup milk with 1 tbsp vinegar)
• 1 tbsp chopped/grated ginger, for topping.

Directions
Preheat the oven to 375˚F. Butter a 9” cake pan and line with parchment paper. Set aside.

Combine ginger, 1/4 cup of sugar and lemon juice in a small pot over medium heat. Simmer until the sugar is melted and the mix is hot, stirring occasionally. Remove from heat and add cranberries, prunes and lemon rind. Set aside.

Combine flour, bran, oats, baking soda, baking powder and salt in a bowl; set aside.

Beat together the butter and 3/4 cup sugar until light and fluffy (about 3-5 minutes). Add eggs one at a time, beating well before each addition. Beat in half the flour mixture, the buttermilk, then the remaining flour, mixing well after each addition. Stir in dried fruit mixture until combined.

Pour batter in the prepared cake pan. Bake for 40 minutes, or until a toothpick/knife comes out clean. Cool in the pan for 10 minutes before turning out onto a cooling rack. Top with your favourite icing and some grated ginger. Enjoy.

Thursday, 27 March 2014

Pumpkin Cinnamon Rolls with Cream Cheese Frosting

This winter has a firm hold on us, eh? It's almost April and we have yet to have more than a few days where it's above zero- here in London, we keep going from almost-spring weather back to -10 highs. I'm tired of it! Give me the warmth- I'd take anything above 0.


Sometimes it's hard to get out of bed when it's grey and cold outside. But, having some warm, delicious cinnamon rolls made by your awesome friend sure help matters. Sarah made these rolls last year (they were devoured) and had promised to make them again this winter. I was more than excited to not only help myself to her baking, but also to show off her work here! She ended up making two batches, the first of regular sized buns, then a second with little mini ones (which are adorable). Whatever the size, these buns are beyond amazing, especially when warmed up in the microwave.

Also! The addition of pumpkin makes these rolls about as healthy as you can get them without deviating too far from the comforting dessert that this season makes us crave. Because of the pumpkin, very little butter is used in the recipe. Which means you can eat 2 big buns and not feel guilty. Or so I believe.

Sarah made these rolls with the traditional cinnamon/sugar filling, but really you could put anything in there. It actually could be quite good with a mozzarella/sage filling if you want to go savoury. I'm imagining how that would taste now- maybe I should get Sarah to make just one more batch...

However you do it, next time you're looking for a decadent treat that tastes like a warm hug feels, try out this recipe! You won't regret it.


Sarah's Pumpkin Cinnamon Rolls
Makes 24 big rolls, 50 small rolls (depending on how small you go)

Ingredients
Rolls:
• 1/4 cup warm water
• 2 1/4 teaspoons active dry yeast
• 3/4 cup evaporated milk
• 3/4 cup granulated sugar
• 2 cups pumpkin
• 3 tablespoons butter (melted)
• 1 egg, slightly beaten
• 2 teaspoons cinnamon
• 6-8 cups all-purpose flour

Filling:
• 1/3 cup butter (melted)
• 3/4 cup brown sugar
• 1/2 cup granulated sugar
• 1 1/2 tablespoons cinnamon

Frosting:
• 2/3 cup cream cheese (softened)
• 1/2 cup butter (softened)
• 2 cups powdered sugar

Directions
1. Combine water and yeast in a large bowl. Add a pinch of salt. Allow to stand until the yeast starts to bubble (5 to 10 minutes). Stir in the evaporated milk, sugar, pumpkin, melted butter, egg and cinnamon. Add in 4 cups of the flour and stir to combine. Continue adding the flour (1/4 cup at a time) until the dough comes together and pulls away from the side of the bowl. Knead the dough until smooth and elastic (5 to 8 minutes).

2. Form the dough into a ball and place in a greased bowl. Cover and let rise until about doubled (about 1 1/2 hours).

3. In a small bowl, melt the butter. In another bowl, combine the brown sugar, granulated sugar, and cinnamon. Grease two 9” x 13” baking dishes with butter (or non-stick cooking spray).

4. Punch the dough down, then divide into 2 equal portions. Working with one portion at a time, roll the dough out on a floured surface to about a 12” x 16” rectangle. Spread half of the butter on the dough, and sprinkle half of the filling mixture on top. Starting at the long side, roll the dough into a log. Cut the log into equal slices. Transfer the slices to the baking dish. Repeat with the remaining ingredients.

5. Lightly press the rolls down, then cover and allow to rise until almost doubled (about 45 minutes).

6. Preheat oven to 350°F. Bake the rolls until golden brown (about 30 minutes). Allow to cool.

7. To make the frosting, beat together the cream cheese and butter. Add in the powdered sugar and beat until light and creamy. Frost the rolls while still warm.

Monday, 3 March 2014

Cranberry Pistachio Salted Caramel Bars

I can't get over how fast 2014 is flying already. I know it's the year of the Horse, but how can it already be March???? Time flies when you actually have things to do I guess!

Apart from working, the fam and I just came back from Jamaica- which was awesome. So warm. It was a bit hard coming back, though. We got so used to just rolling out of bed in our pjs and walking outside. Back here in Canada, it takes at least 5 minutes to just get dressed to weather the cold!

But enough about me complaining of the weather. On to the food! Today I have an awesome recipe that I made back in December but haven't gotten around to posting until now. It's adapted from lcbo's food and drink and I gotta say, it's probably one of the best things I've baked in a while! Shortbread base with a hint of oats, pistachios and cranberries that basically sing Christmas, and just enough decadent salted caramel to bring it all together. I seriously cannot sing enough praise about this bar. I had to exercise all my restraint not to just sit down and eat the whole batch. This one is definitely going to go on the yearly Christmas Goody List. Props, LCBO!


The only change I made was I used ground oats instead of wheat germ, since I didn't have any at the time (read: I forgot to get it at Bulk Barn). Other than that, the recipe can be found on LCBO's site here: Cranberry Pistachio Salted Caramel Bars. For those of you who haven't heard of LCBO's Food and Drink, check out their site! They have a bunch of amazing recipes.


Wednesday, 13 November 2013

Showdown Chili

London officially has snow on the ground. We got about 10cm the other day, so not enough to result in any snow days, but enough to have it feeling a lot like Christmas. I wish it was December so I could start celebrating! Starbucks has its Christmas drinks and cups out as well, and I admit to already having a few peppermint mochas.

Though, the snow does make walking the dogs a bit more eventful. Since their hair is so curly, they often get back into the house with huge snow growths on their legs. Zoe gets them really bad and ends up waddling all the way home (which I find hilarious, but then I have to bundle her up in towels and blankets and cuddle her until she defrosts. Which isn't a hardship, really). Today, Sarah got their jackets out and, though I lean more towards big dogs and not dressing your pets up, I gotta say that they looked pretty damn cute.


And what's better to have after a walk on a cold, winter-ish day than a bowlful of chili? I love having a steaming bowl of hot goodness when it's cold outside- nostalgia and comfort and deliciousness. It's even better when your friend buys you a slow cooker for your birthday! So this was my chance not only to make a hot, scrumptious meal, but also to break in my new kitchen toy. The chili recipe I chose to make has been on my to-do list for ages. Has anyone tried recipes from Bite Me? I've done nearly every recipe in their book. I absolutely love it.


Now, as with most chili recipes, you can make it as hot or as mild as you want to. I went more on the mild side this time, as my friend is not a huge fan of so-hot-I-sweat food. However, it's as easy as adding a few more pinches of chili powder or a few more jalapeños if you want to make it hotter. I made my chili in my new, shiny slow cooker, but it'd be just as easy to simmer the stew in a pot over the stove for a good few hours on low heat. Either way, the result is a delicious, belly-warming chili that is bound to get you through the cold days.


Showdown Chili
Adapted from Bite Me
Serves 8 big bowls

Ingredients
• 1 medium red onion, chopped
• 1 tbsp chili powder
• 1 tsp dried oregano
• 1 tsp ground cumin
• 1/2 tsp each salt and pepper
• 1 red pepper, chopped
• 1 green pepper, chopped
• 2 cups sliced white mushrooms
• 1 medium carrot, peeled and chopped
• 2 garlic cloves, minced
• 1/2 can of pickled jalapeño peppers (depending on how spicy you want it)
• 1 can diced tomatoes with juice
• 1 can black beans, rinsed and drained
• 1 can of your favourite baked beans
• 1 3/4 cups canned chickpeas, rinsed and drained
• 1 1/2 cups canned red kidney beans, rinsed and drained
• 1 cup mild salsa
• 1 cup vegetable broth
• 1 tbsp cocoa powder
• 1 tsp packed brown sugar
• 1/4 tsp cayenne pepper
• 1 cup canned cream style corn
• shredded mozzarella cheese for topping

Directions
Put everything into your slow cooker and cook on low for 3-4 hours, stirring every so often, until everything is stew-soft and awesome.

For stove top: in a large pot, heat 1 tbsp of olive oil over medium heat. Add onions, chili powder, oregano, cumin, salt and pepper. Cook until the onion is translucent, about 5 minutes. Add the peppers, mushrooms, carrots, garlic, and jalapeños. Cook, stirring, for 5 minutes. Stir in diced tomatoes and all the beans, salsa, vegetable broth, cocoa powder, brown sugar and cayenne. Bring to a boil and reduce heat to low. Cover and simmer for 40 minutes, stirring every so often. Add corn and serve in bowls with cheese.

Thursday, 19 September 2013

Curry Tuna Wraps

Happy Thursday everyone! Can you believe how fast September flew by? I feel like my roommates only just started school days ago, but it's already been two weeks. I graduated last June, so I'm the bum of the house; no job or school, just my medical school applications to do. But! I will be off to Europe in October soon. My friend and I are going to backpack through Italy, France and Spain for 3 weeks. It'll be awesome. I can't wait to try all of the food- pasta, pizza, bakeries, coffee. Ah, it's going to be great.

The weather is really weird here in Ontario. We go from fall weather back to summer humidity over 24 hours. Today it's going up to 30˚C! I don't know what to cook half the time- fall-warming soups or summery salads? I probably should enjoy the warm weather while it lasts, because before you know it that Canadian winter will hit. This week, though, I decided to make a tuna wrap from Chef Michael Smith's book Fast Flavours. Does anyone else absolutely love that man? I think I have all of his cookbooks. They're so great; delicious recipes and huge, colourful pictures. And they're nice and thick, so you get a lot for the price. For those of you who like buying cookbooks but balk at the price, try looking online. Here in Canada, Chapters.Indigo.ca often has cookbooks for half the price online as they do in store.


But more on the food. I was totally impressed with this wrap. I don't often do wraps, don't ask me why, but this one has definitely become one of my favourites. Not only is it extremely easy to buy for and make, it tastes amazing. The curry definitely brings another level to the filling (I tried it without and while it's still good, the curry makes it amazing). The avocado and tuna bring in a lot of good fats. Add some spinach in there and you have quite the healthy meal! I used Miracle Whip with Olive Oil for the wrap. Regular mayo will work fine, but that olive oil mayo is so very delicious that if you haven't tried it, you are definitely missing out! I really recommend this recipe for those who like simple, quick meals that look and taste elegant. Like many of Chef Michael Smith's recipes, this one is a definite must-try!


Curry Tuna Wraps
Adapted from: Chef Michael Smith Fast Flavours (110 Simple Speedy Recipes)
Makes 4 wraps


Ingredients
• 2 cans of your favourite tuna, drained
• 1/2 cup Mayonnaise with Olive Oil
• 2 tbsp green relish
• 1 tbsp curry powder
• 1 avocado, cut into chunks
• 1/2 red or green pepper, chopped
• 4 large whole wheat tortillas
• Salt and pepper to taste
• A few handfuls of fresh spinach

Directions
In a medium bowl, mix the tuna, mayonnaise, relish, curry powder, red or green pepper, and salt and pepper. Gently stir in the avocado to combine.

To assemble, lay out the tortillas. Divide the tuna salad among the wraps and top with a small handful of spinach (not too much or you won't be able to wrap it!). Roll each wrap up tightly, folding the sides in as you do. Cut in half and enjoy!

Thursday, 27 June 2013

Daring Bakers: Crostate

Phew, this summer has been boiling, hasn't it? Here in Ontario, this season took it's time arriving, giving us cool weather all through May and half of June. The second that summer officially hit, though, it was like someone kicked Mother Nature in the butt and suddenly it was 28 degrees (Celsius, mind) with a humidex of 36. Jesus. Bless air conditioning.

I've been a horrible foodie and neglecting my blog. I have no real excuse. But I promise to attempt to redeem myself and nurse my poor Phenomenom back to health this summer! We have a bunch of food festivals heading our way, so I should have plenty of inspiration.

Today, I come back to the online foodie world with a recipe from the Daring Bakers. Rachael from pizzarossa was our lovely June 2013 Daring Bakers’ host and she had us whipping up delicious pies in our kitchens! Cream pies, fruit pies, chocolate pies, even crack pies! There’s nothing like pie! :)


I chose fruit pie and went tropical with a mango jam filling. It's a little twist that worked amazingly. This pie is fruity, refreshing and perfect for a hot summer day (especially if you scoop on some coconut ice cream!). Try it out yourself- you can use any jam, nut paste or curd (ugh, I was tempted to go curd- a rhubarb curd would be awesome, don't you think?).

The recipe was adapted by our host Rachael from Carol Field's "The Italian Baker".


Italian Crostate with Mango Jam
Ingredients
Filling: You'll need about 2 cups of jam/curd/nut paste for this pie. Use more or less, depending on your own pie. You can make your own, demand a jar of your friend's homemade stuff or buy it. As long as you like how it tastes, go crazy! I used this recipe for mango jam from AllRecipes.com (I put in saffron and found it a bit overpowering, so next time I'll probably leave it out).

Italian Pie Pastry (Pasta Frolla)
•2/3 cup (160 ml) (150 gm) (5-1/3 oz) unsalted butter, room temperature
•1/3 cup (80 ml) (75 gm) (2-2/3 oz) sugar
•1 large egg, room temperature
•1 teaspoon (5 ml) vanilla extract
•grated zest of 1 medium lemon
•1-2/3 cups (400 ml) (225 gm) (8 oz) all-purpose (plain) flour
•pinch salt

Glaze
Note: This will make more than you need. Store leftover glaze in a jar in the fridge and reheat before using. It should keep indefinitely.
•1/4 cup (60 ml) (75 gm) (2-2/3 oz) apricot jam (or any jam, really. I used my mango jam)
•1-2 teaspoons (5-10 ml) freshly squeezed lemon juice

Directions
Pastry
1. Using a paddle attachment on a stand mixer or an electric hand mixer or whisk, cream the butter and sugar until pale and fluffy, 2-5 minutes. The amount of time you cream the butter will affect the final dough - longer means lighter which in turn means a softer, more fragile dough which is less easy to work, but I prefer the texture of the cooked pastry this way because it's lighter too. If you want to do a more intricate lattice, I'd recommend a shorter creaming time so you have a firmer dough.
2. Add the egg, vanilla and lemon zest, one at a time, mixing thoroughly after each addition.
3. Add the flour and salt and mix until the dough comes together but remains soft, about 1 minute using a stand or electric mixer or a wooden spoon if mixing by hand. Don't over-mix.
4. Wrap dough in plastic wrap and refrigerate for 30 minutes to one hour.
5. When getting ready to bake, rest dough at room temperature for about 30 minutes.
6. Lightly grease a shallow 9"/24cm metal pie dish.
7. On either a piece of parchment or a lightly floured surface, roll 2/3 of the dough (2/3 is about 12oz/340g) out to a circle to generously line the pie dish. You can use parchment with a circle traced on it so you can roll it as quickly as possible, before the dough gets too soft to handle, then use the parchment to transfer it to the dish.
8. Transfer the dough to the pie dish, press in gently and roll the edges to form a good surface for attaching the lattice later. Prick all over the bottom with a fork.
9. Refrigerate the dough-lined pie dish for 30 minutes to reduce shrinkage during baking.
10. Preheat oven to moderate 350°F/180°C/gas mark 4.
11. Line pastry with parchment and fill with dry beans or pie weights. Bake until set, around 15 minutes.
12. Remove the weights and parchment and allow to cool. If using a springform or loose based pie dish, remove the side of the pan.
13. Preheat oven to moderately hot 400°F/200°C/gas mark 6.
14. Roll the remaining dough to fit the pie dish and cut it into roughly half inch/1.5cm-wide strips (or cut it into shapes, like I did).
15. Spread the filling over the par-baked crust.
16. Arrange the strips of dough in a lattice over the filling (see links below for some how-to guides - you can do an intricate intertwined lattice or a very simple overlay one like I've done), trim as needed and lightly pinch the ends onto the rolled edge of the bottom crust.
17. Place pie dish on a baking sheet and place in center of oven. Bake until lattice is golden, around 20 minutes. Meanwhile, prepare the glaze.

Glaze
1. Heat the jam and water in a small saucepan over medium heat until mixture comes to a boil. Alternatively, you can heat it on medium-high in a bowl in the microwave for about 2 minutes, stirring halfway.
2. Strain through a fine mesh sieve if it's chunky.
3. While glaze and pie are both still warm, brush over lattice crust.
4. Allow pie to cool completely before serving.

Thursday, 17 January 2013

Guava Curd Bars

Oh man, nothing like the first post of the year. Full of expectations and hope! I got a new flash for my camera for Christmas, which I'm still trying to figure out. I have a bunch of photography tutorials saved on my Pinterest, but I never seem to find the time to spend a whole afternoon learning from it. Probably because I'm usually sick of learning anything by the time I have a free moment, haha.

Did everyone have a good holiday, though? It sure went by fast. Holy crap, it feels like November was just yesterday. I've now started my last semester of my undergrad. It's a bit daunting and unbelievable how fast these past four years flew.

But enough of my personal issues, let's talk about food! I made these jam curd bars over the Christmas holidays, just following a simple recipe for oatmeal bars and stuffing it with the goods. I never thought to combine jam and curd before, but I had leftover lime curd and guava jam so I thought: 'why not? They're both tropical!'.

I was pleasantly surprised with how they turned out! They're sweet, but balanced by the tanginess of the lime curd. I added coconut to the base and topping and it adds another tropical kick. I really enjoyed these. They make a good dessert or a power snack during the day. My mom's friend went bonkers for them- he absolutely loved it!


Guava Curd Bars
Yields 1 8x8" pan
Ingredients
6 tablespoons unsalted butter, room temperature
1/2 cup brown sugar, packed
1 egg
1/4 cup sugar (you can use brown, white or honey)
1 1/2 cups old fashioned oats
1 cup all purpose flour
1/2 cup unsweetened coconut
1/2 teaspoon baking soda
1/2 teaspoon salt
1/2 cup guava jam (if you can't find guava, use your favourite jam! Marmalade would be nice in this too)
1/2 cup lemon or lime curd

Directions
Preheat oven to 350F. Grease a square 8x8" pan and set aside.

In a large mixing bowl, cream together butter and brown sugar. Once light and fluffy add the egg and 1/4 cup sugar until combined. Add in the oats, flour, baking soda, and salt until it's a big sticky mess.

Press 3/4 of the batter into the bottom of the prepared pan. Spread the curd and jam evenly over the base and crumble the rest of the batter over the top.

Bake for 25-30 minutes, or until lightly browned. Let cool completely before cutting. Enjoy!

Monday, 24 December 2012

Mexican Chocolate Bars

Merry Christmas, Happy Holidays and cheers! Can you believe it's already Christmas tomorrow? I feel like this month just flew by, though that could be because of studying, exams and essays. I don't know about you guys, but I'm more than ready for the holidays.


My mom and I have a tradition where we go to Toronto and see the Nutcracker at the National Ballet. We've been going for over 13 years now and every time we go have high tea (usually at the Royal York) before seeing the show. The only difference now is that mom and I return to our hotel room after and drink some wine! The show was great (once again) this year. Our Nutcracker was the same as last year and, man, he was even better. He could practically fly (and, phew, the legs (and ass) on him!).

What are some of your Christmas traditions?

These Mexican chocolate bars are adapted from a recipe found in the Holiday 2012 Food and Drink. They are absolutely delicious! Smooth, rich and with just enough spice to give you a kick that leaves you drooling for more. Decadence and spice- what more can you ask for in a Christmas treat?

My gluttony aside, I hope everyone has an amazing holiday, filled with good food, tasty drinks, and awesome company.


Mexican Chocolate Bars
Adapted from: Holiday 2012 Food and Drink
makes 32 squares

Ingredients
Crust
1 cup graham cracker crumbs
1/2 cup finely chopped toasted walnuts
1/8 cup unsweetened cocoa powder
1/8 cup dark hot chocolate powder
1 1/2 tbsp sugar
1/4 tsp salt
1 tsp grated orange rind
1 egg
1/4 cup unsalted butter, melted

Filling
1 1/2 cups whipping cream
1 tsp ground cinnamon
1 tsp allspice
1/2 tsp cloves
1 tsp chili flakes (feel free to put in less if you're sensitive to spice!)
1 cup bittersweet chocolate, chopped (I used chocolate chips)
1 egg, beaten

Topping
1/4 cup bittersweet chocolate
1 tbsp unsalted butter

Directions
Preheat oven to 350F. Line a 9-inch square pan with parchment paper. Set aside.

To make the crust, combine graham cracker crumbs, walnuts, cocoa powder, hot chocolate powder, sugar, salt and orange rind in a bowl. Add egg and melted butter and stir until combined. Put mix into the prepared pan and use your hands to press it down evenly. Bake for 10-15 minutes, or until the crust looks matte and is dry to the touch. Set aside.

To make filling, Pour whipping cream into a small heavy pot. Add cinnamon, allspice, cloves and chili flakes to the cream. Bring the mixture to just a boil over medium-low heat. Remove and let stand for about 20 minutes.

Heat oven to 325F. Place the 1 cup of chocolate into a bowl. Return the cream to medium heat and bring it to just a boil again. Immediately pour into the chocolate and let it stand 30 seconds, before stirring it until it's melted and smooth. Stir in the egg and pour the chocolate mix onto the prepared crust. Bake in the oven for 18-22 minutes or until set with a slight wiggle in the centre. Cool and chill for 30 minutes or until firm.

To make the topping, combine the chocolate and butter in a small heavy pot over low heat. Melt, stirring, until the chocolate and butter are smooth. Use an offset spatula to spread the chocolate in an even layer over the spiced filling. Chill for 30 minutes or until the topping has set. Pull up on the parchment paper to lift the bars from the pan and cut into small squares. Enjoy!

Thursday, 29 November 2012

Daring Bakers: Chocolate Hazelnut Crinkle Cookies

Holiday season is the time for sharing and Peta of Peta Eats is sharing a dozen cookies, some classics and some of her own, from all over the world with us. 

Can you guys believe it's almost December? Holy crap, this semester has gone fast. It feels like I only just started my fourth year and now I'm already halfway done. In another 6 months I'm going to be graduating. What happened to the past four years? They've been a blur of lectures, exams, bars, alcohol and good friends. I couldn't really ask for more, huh?

Speaking of friends, this past weekend my two friends from elementary school came up for a visit. I've known my friend Emily for about 17 years. That's almost all my life. How awesome is that?

So I'm trying to get back on track with the Daring Kitchen and this month we're celebrating Christmas! We had the choice of 12 Christmas dessert recipes to try and I chose crinkle cookies, since they're a classic I've never done before. I used the recipe from Epicurious, with the only tweak that instead of chocolate I used 1/2 cup of Nutella.


These cookies were pillow-soft and went down almost too easily. They weren't too sweet; just sweet enough. We literally ate them off in one day.

So have some fun this month and celebrate! Make sure you all start baking some delicious eats. I definitely will, so expect some more posts soon!

Recipe for the Crinkle Cookies can be found by clicking here. As I said before: instead of bittersweet chocolate I used 1/2 cup of Nutella. Enjoy!

Wednesday, 14 November 2012

Daring Cooks: Brined Roast Chicken

Audax of Audax Artifax was our November 2012 Daring Cooks’ host. Audax has brought us into the world of brining and roasting, where we brined meat and vegetables and roasted them afterwards for a delicious meal!

So I've been pretty busy these last few months. I feel guilty. I haven't updated in ages, but in my excuse, I just started my fourth year of university. My undergrad has just flown by. I'm also doing a thesis project at the St. Joseph's Lawson Health Research Institute (what a mouthful). I'm working with Dr. O'Gorman and his two PHD students Christina and Justin. The focus of the lab is Dupuytren's Disease. I won't bore you with the scientific details, just know that it's a lot of work!

Anyway, this month's Daring Cooks challenge was one that was perfect for the cool fall weather. My mom swears by brining her turkey. It makes the meat succulent, moist and tasteful. I did my first solo brine over the summer using Anthony Sedlak's recipe and it was so good my roommate asked me to make it for her this month.

Brining may seem like a lot of work, but it's really simple. You just have to make what is, essentially, salty water and soak the meat in it. Not too hard, right? And the payoff is huge!

As I said before, I used Anthony Sedlak's brined chicken recipe from his book, the Main. I modified it a bit, but it's a great recipe for anyone willing to try this awesome technique out!


Anthony Sedlak's Brined Roast Chicken
Adapted from The Main, by Anthony Sedlak
Ingredients
Brine:
•3 cups water
•3 cups white wine
•1 stalk celery, roughly chopped
•1/2 onion, roughly chopped
•10 cloves garlic, peeled and smashed
•2 teaspoons whole peppercorns
•3 bay leaves
•3 springs of rosemary
•2 sprigs of thyme (or 2 tsp dried thyme)
•1/4 cup salt
•1/4 cup sugar
Chicken:
•1 3-3.5 lb chicken
•2 cloves garlic, thinly sliced
•2 sprigs rosemary
•4 sprigs thyme
•1/4 cup softened butter
•1 onion sliced into 1/4 in rings
•2 large carrots, chopped into 1" pieces
•2 bulbs garlic, tops cut off lengthways
•3 medium potatoes (white or sweet), chopped into 1" cubes
•1/4 cup olive oil
•salt and pepper

Directions
For the brine: combine all the ingredients in a pot and bring to a boil. Let cool to room temperature. Place chicken in a pot or roasting pan big enough to hold the chicken and the brine. Cover the chicken with the brine, weighing it down if you need to. Place in the fridge overnight.

Roast chicken: Preheat oven to 400C. Remove chicken from brine and pat dry. Strain brine, reserving solids. Smear half the butter and the sliced garlic under the breast skin. Tuck fresh herbs and brine solids (onion, celery garlic cloves, etc) inside before trussing chicken.

Rub remaining butter into skin and season generously all over with salt and pepper. Arrange onion slices, carrots, garlic and potatoes on a lightly oiled roasting pan. Place chicken on top. Roast in the oven for about 1 hour or until juices run clear. Rest for at least 15 minutes before carving.

Tuesday, 14 August 2012

Daring Cooks: Cornmeal

Rachael of pizzarossa was our August 2012 Daring Cook hostess and she challenged us to broaden our knowledge of cornmeal! Rachael provided us with some amazing recipes and encouraged us to hunt down other cornmeal recipes that we'd never tried before – opening our eyes to literally 100s of cuisines and 1000s of new-to-us recipes!


Now that the Olympics (and my MCAT) is done my life felt a bit empty- until I realized I have to get started on my med-school applications. Damn it. Talk about stressful! I want to just close my laptop and hope it sorts itself out. Can't you hire people to do this for you? I wish.

The best way to ease stress? Cooking. And this month's Daring Cook's challenge provided the best distraction. I love cornmeal- so many good things come from it, like cornbread, Jamaican patties, Jamaican festivals, Chicago pizza.... Etcetc. It's such an awesome ingredient- I was totally excited to use it in this month's Daring Cook's challenge.

At first I wanted to do a twist on cornbread, but then decided to do something more along the lines of Jamaican cuisine. At first I wanted to try making Jamaican festivals- deep fried fritter thing. Absolutely delicious. We had them last time I was in Jamaica and my friend and I became totally obsessed. However, when I tried to make them it didn't come out so well so I decided to try something a bit less tricky (for now).

So my mom and I settled on doing a corn fritter- stuffed full of jerk chicken. Hells. Yeah. Stupidly easy to make, tasty and filling- a great Sunday brunch with just enough spice. For something thrown together willy-nilly it came out pretty great, if I do say so myself.

Jerk Chicken Cornbread Fritters
Makes 6 fritters
Ingredients
1 cup all-purpose flour
1/2 cup yellow cornmeal
2 teaspoons baking powder
1 tsp jerk seasoning
2 tablespoons butter, melted
2 eggs
1 tsp salt & pepper
1⁄2 cup buttermilk
3/4 cup jerk chicken (I used this recipe)
1 bunch green onions
2 tbsp oil for frying

Directions
Mix flour, cornmeal, baking powder, jerk seasoning, pepper and salt in a large bowl. In another bowl, combine eggs, butter, and buttermilk. Add to the dry ingredients and stir until just combined. Fold in the jerk chicken and green onions. Divide into 6 patties.

Heat a skillet over medium high heat. Fry each patty until golden brown- about 3-4 minutes a side. Drain on a paper towel. Serve hot with your favourite topping (I suggest mayo + hot sauce). Enjoy!

Monday, 6 August 2012

Graham Cracker Cake with Chocolate Covered Banana Chips

Hooooo-leeeee cow. What a couple of months it's been. July didn't even exist for me. It was just a blur of hot weather, humidity, studying and Supernatural. I had my MCAT last Friday, which was, honestly, the hardest exam I have ever taken in my life. Halfway through (it was a 4 hour exam) by eyes were blood shot. I got home and nearly collapsed on the couch. But! It's over and now I can finally relax and enjoy the summer fully! All there is left now is to wait for my mark and pray that it was enough!

So, I decided that, with the MCAT finally over, I deserved a cake. Hell, I deserved a cake and a whole lot of booze, but I figured I'd start out with the cake. I've had this recipe in my binder for a couple years now, but have never had the chance to try it until now. I absolutely love graham crackers- don't ask me why, I just do. Sometimes, when we make s'mores I just use it as an excuse to eat the graham crackers. Yes, I know, I'm weird, but I'm okay with it.

This cake is some sort of amazing. There's no flour in it- just the crushed graham crackers. How cool is that?? The original recipe, from Style at Home, had a whipped cream frosting- but you guys know me and my cream cheese frosting, so I had to use that instead. That, and I tweaked it one other way: I added chocolate covered banana chips. Holy crap, it was a stroke of genius, I tell you. The crunch from the banana gives the cake another layer of textural awesome, plus the hint of chocolate and banana is just addictive. I put the chips in the cake and in the cream cheese. Fantastic.

The cake is almost gone, but not because I ate it all alone (thankfully). Even my brother thought it was amazing, which is saying something since it has a minimal amount of chocolate in it! Though, we all agreed in saying the taste reminds us of a carrot cake for some reason, even though there's no carrot in it at all. I think it's from the molasses in the graham crackers plus the cream cheese frosting. Honestly though, I dunno why but it does taste like a carrot cake. Which means it tastes freaking delicious. All the awesome of graham crackers in a super mouthwatering, moist cake. Perfect for the summer. I challenge you not to finish in three days.

As a side note: for any equestrian watchers out there, is anyone else out there following the story about the Canadian jumping team and Tiffany Foster's disqualification? Absolutely heartbreaking and totally uncalled for. Seriously.

To help ease my anger I eat cake. So here's the recipe!


Graham Cracker Cake
Adapted from Style at Home
Makes one 8" two layer cake

Ingredients
Cake
• 25-30 graham crackers, crumbled (about 3 cups)
• 1/2 cup unsweetened shredded coconut
• 2 1/2 teaspoons baking powder
• 1 stick (1⁄2 cup) unsalted butter, at room temperature
• 1 cup sugar
• 4 eggs, separated
• 1 teaspoon vanilla extract
• 1 cup milk
• 1/8 teaspoon cream of tartar
• 2/3 cup chocolate covered banana chips, chopped

Cream Cheese Frosting
• 8 ounces butter, at room temperature
• 8 ounces cream cheese, at room temperature
• 2½ cups powdered sugar
• 1 tablespoon vanilla extract
• 1/3 cup chocolate covered banana chips, crushed
• 1/2 tsp banana extract

Directions
For the cake:
Preheat the oven to 350F. Grease two 8" circle cake pans and line the bottom with parchment paper.

In the food processor, pulse the graham cracker crumbs and coconut until very fine. Add the baking powder and pulse until combined. Transfer to a bowl and set aside.

With the mixer on medium-high speed, cream the butter and sugar until smooth. Scrape down the sides of the bowl occasionally.Add the egg yolks, two at a time, beating for 1 minute after each addition, scraping down the sides of the bowl when needed. Beat until blended. Stir in the vanilla extract.

Reduce the mixer speed to low. Add 1 cup of the crumb mixture along with 1/3 cup of milk and mix to blend in. Repeat until all the crumb mixture and milk are blended in.

Set up the mixer with a clean, dry mixing bowl and whisk attachment. Beat the egg whites on medium speed until frothy. Add the cram of tartar and kick the mixer up to medium-high. Beat until the egg whites form soft peaks.

Fold half of the egg whites into the graham cracker batter, folding. Add the rest and fold until blended. Spoon the batter into the prepared pans, and smooth the surface with a spatula or wooden spoon. Top each with the chopped banana chips and bake for 25 or 30 minutes, or until the cake layers begin to come away from the sides of the pan and are spingy to the touch.

Let the cakes cool in the pans for 10 minutes, then unmold onto the cake rack to cool completely.

For the frosting:
In a large bowl, beat the butter and cream cheese until smooth, about 3-5 minutes. Gradually add in the powdered sugar until blended. Add the vanilla and banana chips and fold until mixed.

To assemble:
Place one cake layer on a plate. Spread half of the frosting on top, making sure it's level. Top with the other cake layer. Cover the whole cake with the cream cheese frosting. Enjoy!!

Monday, 2 July 2012

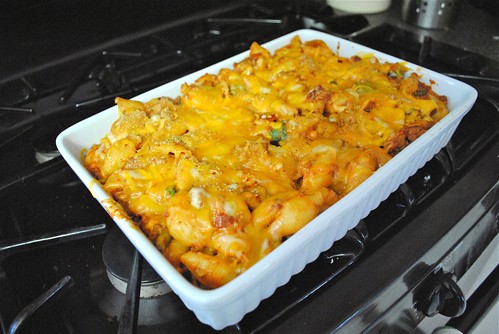
Cheeseburger Casserole

This weekend, three of my friends from elementary school came down for a visit. I've known these girls since before I even knew myself, if that makes any sense. My friend, Emily, has been with me since junior kindergarden. We counted- that's 18 years this September. It's a bit hilarious when you consider knowing someone that long- someone that's not related to you. Though after that long, they may as well be related to you.

It was an epic weekend. We saw Magic Mike yesterday, which was pretty damn good. Everything that you would expect it to be and a little bit more. I like how it was shot too (not just because of all the naked men, either). But mostly the weekend was full of acting like kids, drinking, and eating. One of the things we stuffed ourselves with was this cheeseburger casserole.


Now, this casserole was the first dish I ever made by myself. It's super simple, quick to make and cheap to buy (everyone has their own version of it, and this is hardly original, but when is there ever too much fo a good thing?). This cheeseburger casserole was an instant hit with my brother. He would tell all his friends about it, until they came over and I ended up making it for them too. Now it is sort of famous with our group of friends, which is amusing, since it really isn't that special. Or maybe it is, because of how genius it is in its simplicity. It's basically homemade Hamburger Helper. But 100000x10^10000 better. And very easy to personalize and tweak. You could probably make it taste a bit different each time you make it. Which I do, whether by accident or on purpose.

This recipe is what I use for the backbone of the casserole. However, feel free to add any of your favourite spices or condiments to it- because that's where this recipe really shines. I love adding Chinese five spice and BBQ sauce, but really, any combination would probably turn out to be amazing. I also picked shell pasta because I love how everything gets stuck inside them. Really, you could use any short pasta, but I highly recommend either shell or cavatappi. I like it spicy, but feel free to leave out the cayenne/hot sauce/jalapeño if you enjoy a milder spice.


All of my friends thought that this should have been the first post on my blog. I really have no reason as to why it wasn't other than the fact that I had no reason to make it at the time. Which is kind of silly, when I think about it. When is it ever a bad time to make CBC?

Cheeseburger Casserole (aka: CBC)
Serves 6
Ingredients
• 6 cups uncooked shell pasta
• 6 strips bacon, cut into cubes
• 1 lb ground beef
• 1 Italian sausage, casing removed
• 2 cloves garlic, minced
• 1 can condensed tomato soup
• 1 green onion, chopped
• 1 tbsp Italian seasoning
• 1 jalapeño pepper, chopped
• 1 tsp cayenne pepper
• 3 cups shredded cheese (use a strong cheese, like cheddar or Monterey Jack)
• Hot sauce and salt and pepper to taste

Directions
Grease a 9x13" casserole dish and set aside.

Boil a pot of salted water and cook pasta until al dente. Drain and set aside

Meanwhile, in a medium pan over medium heat, cook bacon pieces until crispy. Set aside on a paper towel and drain the pan. Cook the garlic, sausage and beef in the same pan, breaking the sausage up into smaller pieces until all of the meat is browned. Add in the green onion, spices, Italian seasoning and pepper and stir to combine.

Set your oven to broil. Combine the pasta, beef and bacon in a large bowl (the bowl you cooked the pasta in, if it's big enough). Add the tomato soup and 1 cup of cheese. Stir to combine. Add hot sauce, salt and pepper to taste. Pour into the prepared pan and top with the rest of the cheese.

Broil on high for 3-5 minutes, or until the top is bubbly and golden brown. Remove from the oven and enjoy.

P.S. This can easily be prepared ahead of time and set in the fridge even a day before. Just cook it in a 350F oven for 15-20 minutes, then broil on high for 3-5 minutes.

Thursday, 28 June 2012

The Baker's Apprentice: Potato Rosemary Bread

Oh man, I thought that with summer I'd have more time to post things here and more chances to practice taking pictures. So much for that! I can't entirely blame MCAT studying, because though it does take up a hell of a lot of time, I think it just comes down to summer laziness. Which is fine, right? I mean, it is summer (finally. The heat has set in. In true London style, it's been sunny, hot and humid for the last week, with random days after storms when its cool. Gotta love it!).

I meant to bring my camera with me last weekend down to Victoria Park- it was the first food festival of the summer. So many good eats and I wanted to share it, but, unfortunately, I'm forgetful. I didn't remember until I was at the fest. But fear not! Since there is practically a food fest every other weekend during the summer, I'm sure I'll have another chance to grab some pictures.

It was a pretty awesome festival though, I must say. With food ranging from American pizza, to Jamaican ox-tail and everything in between. There were lots of Korean and Vietnamese vendors, as well as a few Caribbean ones as well. I had to go for curry goat with rice a peas. It was just pure Jamaican deliciousness. Made me wish I was in Jamaica still (where it probably would have been cooler).

A few of my old elementary school friends are coming up for a visit this weekend and I am ready for a huge foofaraw! We're having a slumber party Sunday. Which is basically just a cute way of saying we're going to get wasted. Still, there will be lots of eating involved as well. The point is, Monday I wanted to do a breakfast bake, since I could just prepare it the day before and leave it overnight. Which brought me to baking bread, since this is my last week not cramming MCAT into my head. And of course, when going for bread, I turned to my Baker's Apprentice cookbook, since I am determined to try every recipe he has, and chose his potato rosemary bread simply because I had Ontario potatoes lying around.


I even made my own mashed potatoes. Seriously guys, the better your mashed potatoes taste, the better this bread will taste. Mine was full of garlic, green onions, butter and parmesan cheese and the bread tasted awesome. I had to make sure not to eat half the loaf off (like I usually do).

The recipe makes enough for two regular sized loaves, so you could definitely do what I did and use half for a casserole, or even freeze it for later! It does take some preparation, what with having to make the biga (a starter) the night before, as well as letting it rise for a total of 4 hours. But dude, it is very much worth it. Especially if you make it on a day when you're just lazing around the house anyway (though I did do some cleaning while I let it rise, so it wasn't so much as lazing as procrastinating studying).

I used the recipe straight from the cookbook, so if you have a copy, this is me highly suggesting you try the potato rosemary bread next time you open it up. If you don't have The Baker's Apprentice, you can go buy it (here, or here, for Canadians)- which I highly suggest you do. So far, it's been one of the best purchases I've made this summer!- or you can find the recipe online. I love Brown Eyed Baker, so I'd suggest checking out her version here.

Either way, I hope you guys go for it and enjoy it as much as I did! Make it for your family, friends, loved ones or just for your awesome, gluttonous self. NOTHING SAYS I LOVE YOU LIKE A LOAF OF FRESHLY BAKED BREAD.

Thursday, 14 June 2012

Daring Cooks: Salmon Cannelloni

Manu from Manu’s Menu was our Daring Cooks lovely June hostess and has challenged us to make traditional Italian cannelloni from scratch! We were taught how to make the pasta, filling, and sauces shared with us from her own and her family’s treasured recipes!


Oh hells yeah, we're doing cannelloni this month! I love pasta and cannelloni is an awesomely satisfying dish that looks impressive but really isn't all that difficult to make. I've been bad these past couple months and haven't had time to do the Daring Cooks challenge, so I made sure to get my butt in gear this month. And, come on, it's cannelloni. No complaints here.

I wanted to do something healthy and low in fat and calories, since it is summer and everyone is trying to lose weight and get into that beach-ready state. I should probably join them in their endeavors, and what better way than making a delicious pasta casserole that's actually good for you?


So this is my cannelloni contribution. I used low fat ricotta in the filling and mixed it with canned salmon and local spinach and peppers (I even resisted topping it with 10000 cups of cheese). Yeah, it was as delicious as it sounds. Though it being low calorie and all, you have to restrain yourself from arguing that that means you can eat half of it.

Salmon Cannelloni
Ingredients
• 2 cans of salmon, drained
• 1/2 cup of low fat ricotta
• 1 red pepper, chopped
• 1 cup spinach, chopped
• 2 cloves garlic, minced
• 1 tsp olive oil
• 18 tubes of cannelloni (depending on the size of cannelloni. I used small tubes)
• 2 cups of your favourite tomato sauce
• 6 slices provolone cheese (about 1/2 cup shredded)

Directions
Preheat oven to 350F.

Heat olive oil in a small skillet over medium heat. Add garlic and sauté for 1 minute. Add spinach and cook until wilted. Season to taste with salt and pepper.

Flake salmon into a medium sized bowl. Add ricotta, red pepper and spinach. Season to taste with salt and pepper. If you find it's too dry, add more ricotta (or, if you want, you can use 1 egg).

Spread 1/2 cup of the tomato sauce over the bottom of a 9x13" casserole dish. Using a small spoon (or a piping bag, if you've got the skills), fill the cannelloni tubes, placing them in rows on top of the tomato sauce. Once all of the tubes are filled, top with the remaining tomato sauce. Spread cheese slices on top.

Bake, at 350F, for 20 minutes. Then, turn on your broiler to high and broil for 2-3 minutes, or until the cheese is golden and bubbly. Enjoy!

Thursday, 31 May 2012

Papaya Chutney Grilled Cheese

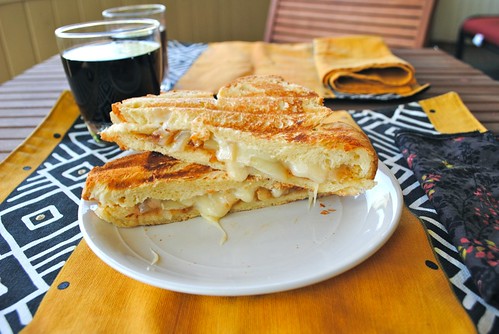
I think I'm a little late jumping onto the whole grilled cheese bandwagon- especially since its national month has already come and gone. Still, better late than never, right? Especially when you have homemade bread to submerge in cheese.


Is it just me or has grilled cheese become even more amazing over the past year? The different combinations of ingredients and flavours I've seen the food community chug out make my mouth water. I want to try all of them! I mean, just think back to when you were a kid and grilled cheese meant just two slices of white bread with kraft cheese. Not like there's anything wrong with that (best hangover cure, if you ask me). But now, I'm seeing sloppy joe grilled cheese, guacamole grilled cheese, even chocolate parmesan grilled cheese (now that I have to try).

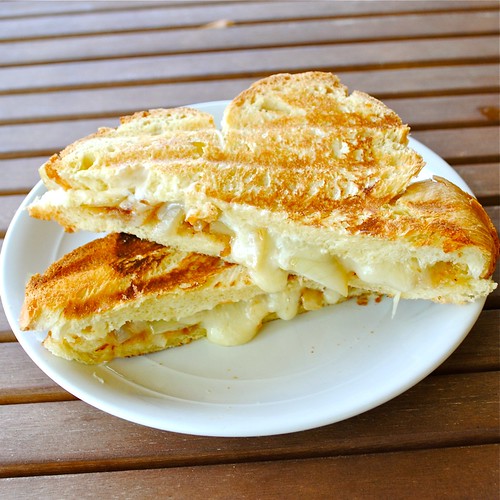
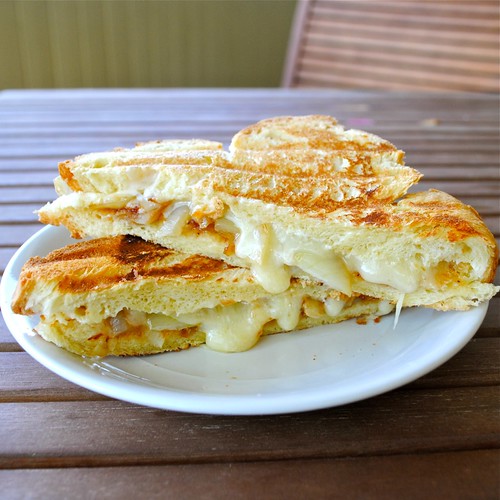
I guess that just goes to show how even the simplest, most nostalgic dishes can be made into an explosion of culinary creativity. And that's just poetic. So here's my contribution: a mouthwatering, savoury combination of Caribbean chutney, sharp cheddar and caramelized onions, all on homemade bread. I came upon papaya chutney on my last day in Jamaica. My mom wanted to get rid of her last few hundred Jamaican dollars and told me to pick something to bring home. I spotted the papaya chutney and thought: 'now that sounds good'. I was wondering what it would taste like- whether it would be sweet or tangy- when I first did try it I was surprised. It has the almost same sort of taste as caramelized onions, but it's more savoury than sweet. The sweetness kicks in just a bit to give it a unique, addictive taste. This is the first time I've used it in a recipe, but, man, did it deliver! If you can find papaya chutney, buy it! It's the kind of ingredient that makes you want to experiment.


Papaya Chutney Grilled Cheese
Serves 2
Ingredients
• 4 slices of your favourite bread
• 1 medium onion, halved and sliced
• 1 tbsp olive oil
• 1 tsp balsamic vinegar
• 2 tbsp papaya chutney (can be found at your local Caribbean store or Asian market. If you can't find it, I suggest using tomato chutney or any other savoury spread)
• 6 slices old cheddar
• 1 tbsp butter or margarine, softened
• 1 tbsp mayonnaise

Directions
Heat oil in a small frying pan over medium heat. Add onions and sauté until translucent, about 5-7 minutes. Turn the heat down to medium-low and let caramelize for 5-10 minutes, or until a deep golden. Add balsamic vinegar and cook for 1-2 minutes more. Remove from heat and set aside.

Mix together the butter and mayonnaise in a small bowl. Set aside.

Spread 1 tbsp of papaya chutney on 1 slice of bread. Top with half of the caramelized onions and 3 slices of cheese. Close the sandwich with another slice of bread. Repeat with the second sandwich.

Heat a skillet at medium heat. Spread the butter/mayo mixture on the outside of each sandwich. Pan-fry on each side until the bread is golden brown and the cheese is gooey and amazing, about 2-3 minutes per side. Remove from heat and enjoy.

Monday, 28 May 2012

Daring Baker's Challah Bread

May’s Daring Bakers’ Challenge was pretty twisted – Ruth from The Crafts of Mommyhood challenged us to make challah! Using recipes from all over, and tips from “A Taste of Challah,” by Tamar Ansh, she encouraged us to bake beautifully braided breads.


Oh man, to say I was pumped we were doing bread this month may be an understatement. I absolutely love bread, as I may have mentioned before. That, and I just got my very own copy of The Baker's Apprentice. Many other food blogs have worked their way through the book and I was itching to get my hands on it. Once I did, I decided that I was going to follow in my peers' footsteps and complete all the recipes. Hilariously enough, my friend got the same cookbook from her boyfriend, so turns out we're doing it together. We've already done the English muffins, which were mouthwatering, and when I saw that this month's Daring Baker's challenge was challah, I knew I had to try out the recipe from the Baker's Apprentice. 


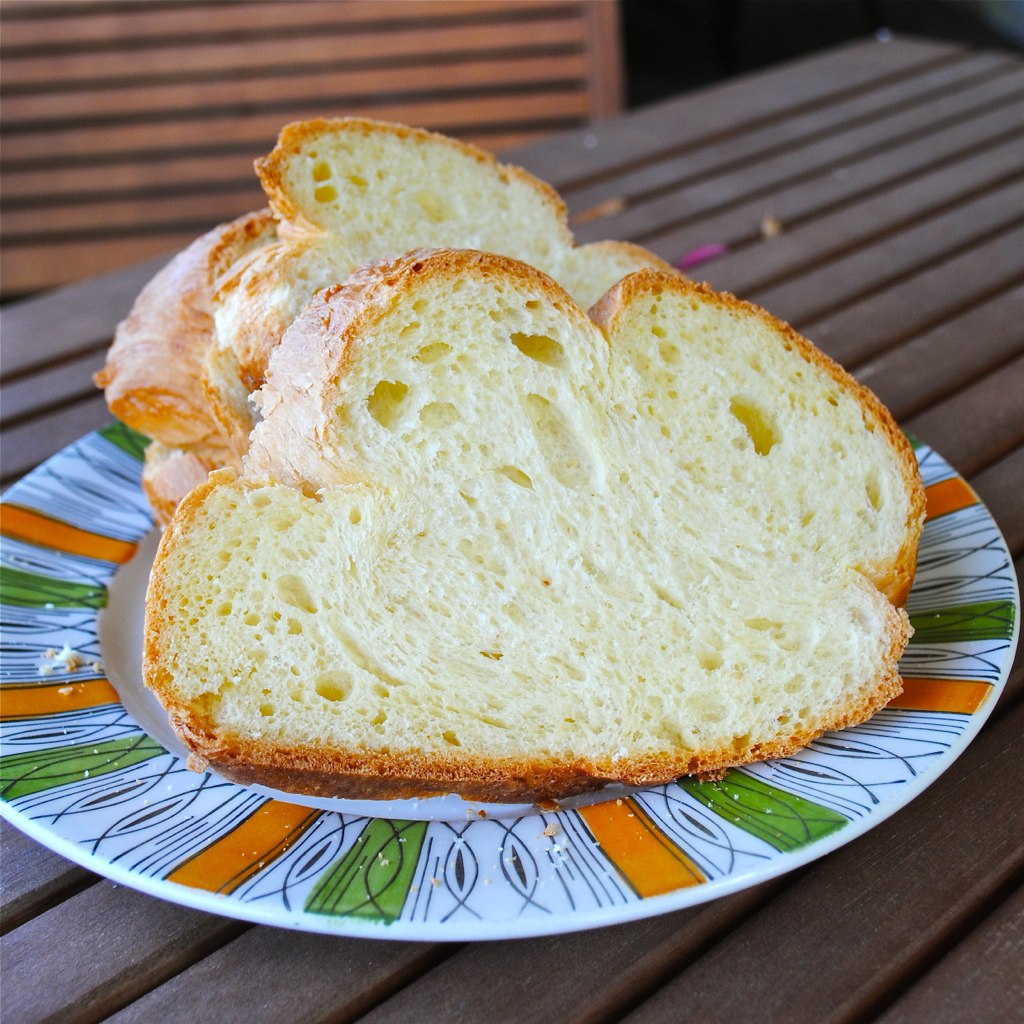
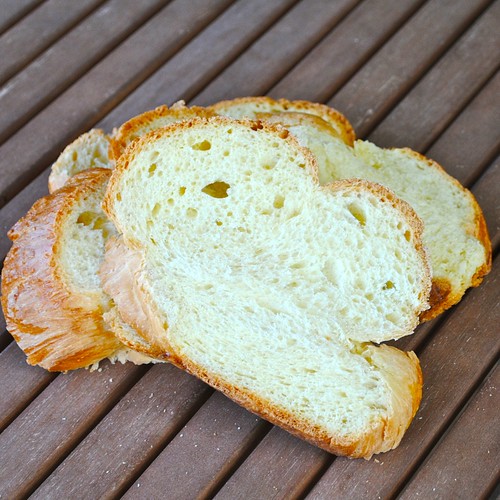
Coincidentally, I made the loaf on the Saturday of Victoria Day weekend. I started out fine... But as the dough rose and the day wore on, my roommate and I decided to mix some cool drinks and sit outside in the backyard. Admittedly, my memory of finishing the bread is a bit fuzzy. I don't even remember braiding it, but apparently I did (and it didn't look half bad!). Though, by the time I got to take a picture of the finished loaf.... we had eaten half of it already:


Either way, by some miracle the bread was finished with no casualties. And, damn, did it taste delicious. I love the softness of the inside of the loaf, contrast to the crunchy crust. Just. Heavenly. I'll refrain from writing an ode about bread and my minor obsession with it. Just get in there and try it for yourself! It's really not that difficult; all you gotta do is follow the recipe. 


Challah, from the Bread Baker's Apprentice, by Peter Reinhart 
Makes 1 large braided loaf, 2 smaller loaves


Ingredients:
4 cups unbleached bread flour
2 tablespoons  granulated sugar
1 teaspoon salt
1-1/3 teaspoons  instant yeast
2 tablespoons vegetable oil
2 large eggs, slightly beaten
2 large egg yolks, slightly beaten
3/4 cup plus 2 Tbsp to 1-1/8 cups  water, at room temperature
2 egg whites, whisked until frothy, for egg wash


Directions:
Stir together the flour, sugar, salt, and yeast in a mixing bowl (or in the bowl of an electric mixer). In a separate bowl, whisk together the oil, eggs and yolks, and 3/4 cup plus 2 tablespoons water. Pour the egg mixture into the flour mixture. Mix with a spoon (or on low speed with the paddle attachment) until all the ingredients gather and form a ball. Add the remaining water, if needed.


Sprinkle flour on the counter, transfer the dough to the counter, and knead for about 10 minutes (or mix at medium-low speed for 6 minutes with the dough hook), sprinkling in more flour if needed to make a soft, supple, but not sticky dough. The dough should register approximately 80°F (27°C).


Lightly oil a large bowl. Form the dough into a boule and transfer into the bowl, rolling it around to coat it with oil. Cover the bowl with plastic wrap. Ferment for 1 hour at room temperature. Remove the dough from the bowl and knead for 2 minutes to degas. Re-form it into a ball, return the ball to the bowl, cover with plastic wrap, and ferment for an additional hour. It should be at least 1-1/2 times its original size.


Remove the dough from the bowl and divide it into 3 equal pieces for 1 large loaf, or 6 pieces for 2 loaves. (Or, for a celebration challah, divide it into 3 equal pieces and combine 2 of those pieces and form them into 1 large dough. Take this larger piece and divide it into 3 equal pieces. Take the smaller dough and divide it into 3 pieces as well; in the end, you will have 3 large pieces and 3 small pieces.) Regardless of the size of the loaves you decide to make, form each of the pieces into a boule, cover them with a towel, and let them rest on the counter for 10 minutes.


Roll out the pieces into strands, each the same length, thicker in the middle and slightly tapered toward the ends. Braid them using the 3-braid method. Line a sheet pan with baking parchment and transfer the loaf or loaves to the pan. Brush the loaves with the egg wash. Mist the loaves with spray oil and cover loosely with plastic wrap or place the pan in a food-grade plastic bag.


Proof at room temperature for 60 to 75 minutes, or until the dough has grown to 1-1/2 times its original size.


Preheat the oven to 350°F (175°C) (325°F (160°C) for the celebration challah) with the oven rack on the middle shelf. Brush again with egg wash and sprinkle sesame seeds on top. Bake for 20 minutes. Rotate the pan 180 degrees and continue baking for 20 to 45 minutes, depending on the size of the loaf. The bread should be a rich golden brown and register 190°F (88°C) in the center. When done, transfer the bread to a rack and cool for at least 1 hour before slicing or serving (or, if you're impatient like me, wait 10 minutes and slice it, shape be damned).

Sunday, 13 May 2012

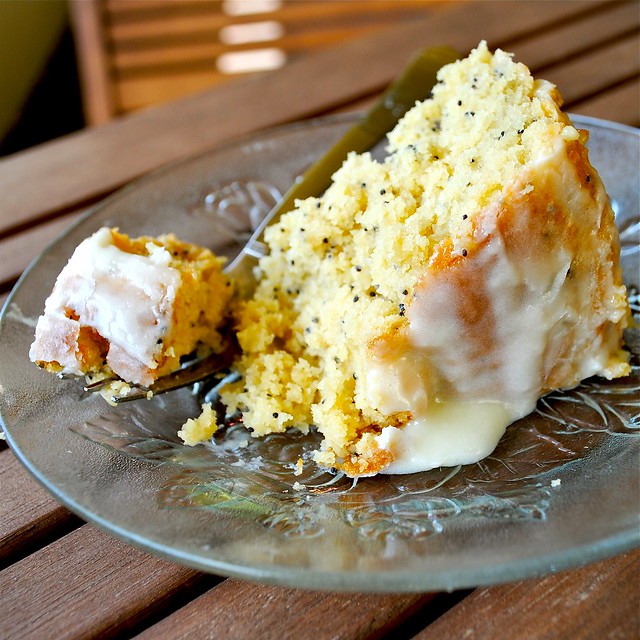
Costello's Famous Sour Cream Pound Cake

It's Mother's Day! What's everyone doing for their moms today? My day has been pretty full so far. Got up this morning and started on an epic lunch for mom. We made oxtail with peanut sauce, stir fry eggplant and bok choy, Jamaican festivals and rice. And also a calzone for my brother, who doesn't eat anything remotely interesting unless you have the patience to push it on him for years until he gives in.


And for dessert? Well, mom loves her pound cake. We have an old recipe from a family friend that is our absolute favourite way to make pound cake. Seriously. Whenever we make pound cake, it's a crime to use any other recipe that's not this one. Just look at it:


Stains = proof of deliciousness, if you ask me. If a recipe is dyed a different colour with food and time, that is a recipe to keep. It uses sour cream instead of milk, which makes it so very moist. It also gives it a nice tart taste that cuts through the richness. Also: cream cheese frosting = always. Any cake (or anything) I can get cream cheese icing on gets cream cheese icing. Pound cake is no exception. I may even be starting to convert mom from buttercream, which is saying a lot.

This cake is so easy to make. It's literally just mixing wet and dry ingredients together. But, man, does it taste amazing! If you guys ever need a simple, quick cake to make someone that tastes like all the love and appreciation you have for that special person, make this.


To all the mothers out there and to all of their dutiful kids who worked hard today to show their love for said moms: HAPPY MOTHERS DAY! Eat awesome food and go to sleep stuffed to the gill!

Costello's Famous Sour Cream Pound Cake
Ingredients
• 1 cup packed brown sugar
• 1 cup white sugar
• 1 cup unsalted butter, room temperature
• 2 1/4 cups all purpose flour
• 1 heaping tbsp baking powder
• 1/2 tsp salt
• 3 eggs
• 1 cup sour cream
• 1 tsp vanilla
• 2 tsp lemon extract
• 1 tsp orange extract
• 1/4 cup poppy seeds

Directions
Preheat the oven to 325F and grease a bundt pan (mine was the standard 10"). In the bowl of a stand mixer (or in a medium sized bowl) cream the butter and sugar together until light and fluffy (about 3-5 minutes). In another bowl, mix flour, salt and baking powder. Add 1 cup of the flour mix, 1/3 cup of sour cream and 1 egg to the butter and sugar.

Mix until incorporated. Add the vanilla, lemon extract, orange extract and poppy seeds. Mix until uniform.

Add 1 cup of flour, 1/3 cup of sour cream and 1 egg. Mix. Add the rest of the flour, sour cream and the remaining egg. Mix until everything is smooth and uniform and you're left with a creamy batter.

Pour the batter into the prepared bundt pan, smoothing out the top. Bake for 45-55 minutes, or until an inserted toothpick comes out clean. Let cool for 5 minutes, then remove from pan and place on a cooling rack. Top with cream cheese icing (recipe follows) and let it melt down the sides. Cool until you can slice it (15-30 minutes) and enjoy!

Cream Cheese Icing
• 3 tbsp butter, room temperature
• 1 cup cream cheese, room temperature
• 2/3 cup icing sugar
• 1 tbsp rum
Beat all the ingredients together until it's a smooth, thick icing.

Sunday, 29 April 2012

Doritos and Hummus

Today was my first day of summer vacation. I think I'm in shock. I woke up and thought 'okay, breakfast, then study'- I had to pause and remind myself that I have nothing left to study for! Gotta love vacation~ Though I do start MCAT studying in a week.... Still, studying for one thing is much easier than studying for five exams.

I made cassoulet last week on a whim. I'd been dying to try out such a classic recipe for a while. It was pretty awesome, but that's not what this post is about. It's about the leftover beans I had. Today, they were staring at me, so I decided to put them out of their misery and made 'em into a hummus!
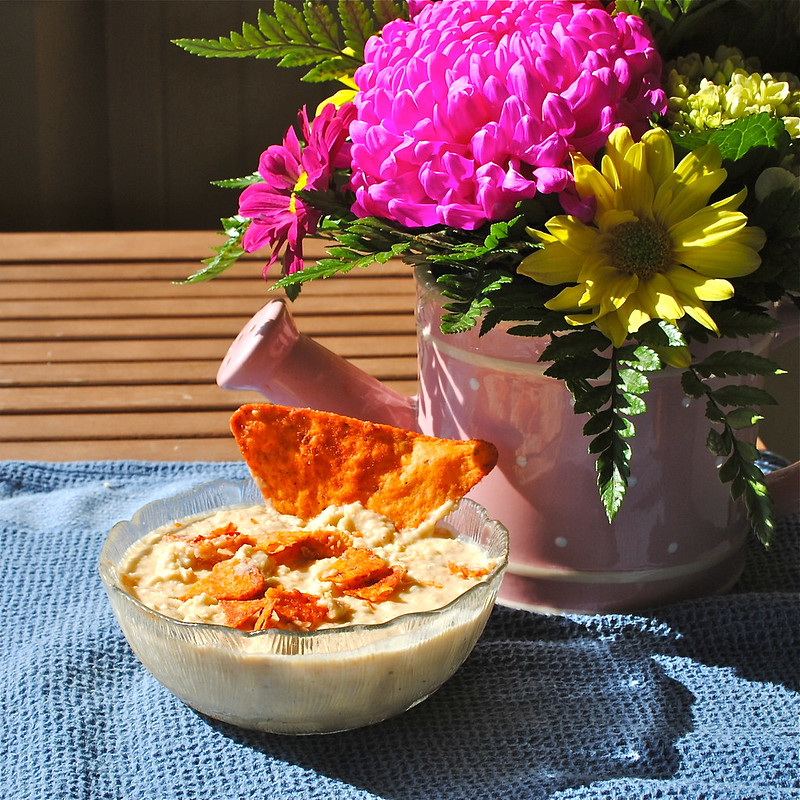
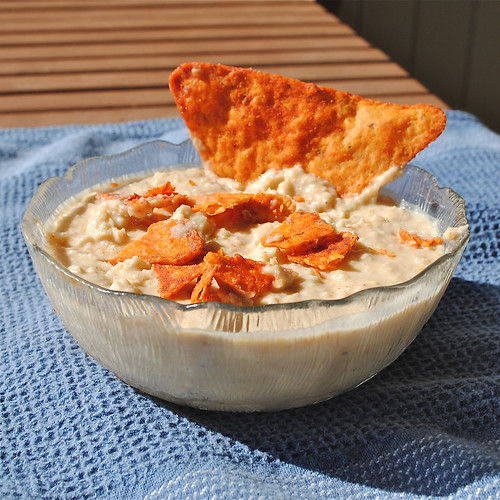
I started out using a recipe from a cookbook, but ended up ignoring it and just going with what I had on hand. Turned out pretty delicious, if I do say so myself! Even better: I had just bought those new BBQ Chipotle Doritos. Now, I didn't really think it through when I grabbed the bag in order to use some chips for the pictures... Then I was cleaning up and tried the chips with the hummus...

OH MAN. It was so good. The spiciness of the chips was cooled by the hummus, which I left a bit chunky so it gave it some texture with the crunch of the chip. It was awesome. If you can't find the BBQ Chipotle Doritos, the Jalapeño Cheddar Doritos would work great as well. Either way, try to stick with a spicy chip- trust me, it's awesome.

Phenomenom Hummus
Makes about 1 1/2 to 2 cups
Ingredients
• 1 cup canned white kidney beans
• 1 cup canned chickpeas
• 3 cloves of garlic
• 1/3 cup of water
• 1 tbsp lemon juice 
 1 tsp salt
• 1 tsp hot sauce
• 2 tbsp tahini 
• salt to taste

Directions
Drain and rinse the canned beans, shaking off excess water. Place in a food processor with the garlic, water, salt, lemon juice and hot sauce. Blend until just shy of smooth; leave it a tiny bit chunky.

Add tahini and blend once more to incorporate. Add salt (and lemon juice or hot sauce) to taste. If it's too thick, add more water. If it's too thin, add more beans (you'll probably have some leftover from the cans) or tahini. 

Serve with BBQ 
Chipotle Doritos and enjoy~